Another game with Jesse today. I used my Pax Arcadian from Dark Realm Miniatures (counting as Tau), and he used his Chaos. We used BFG revised rules again.
My Tau list was:
- 2x Explorer Battleships with Tau Kor'O Commander
- 3 x Hero Cruisers
- 5 x Defender Escorts
- 3x Orca Escorts
- 3x Orca Escorts
Jesse's Chaos list was
- 1x Hades Heavy Cruiser with Commander, 2x Murder Cruisers
- 1x Hades Heavy Cruiser, 1x Murder Cruiser
- 2x Slaughter Cruisers
- 3x Infidel Escorts
- 2x Infidel Escorts
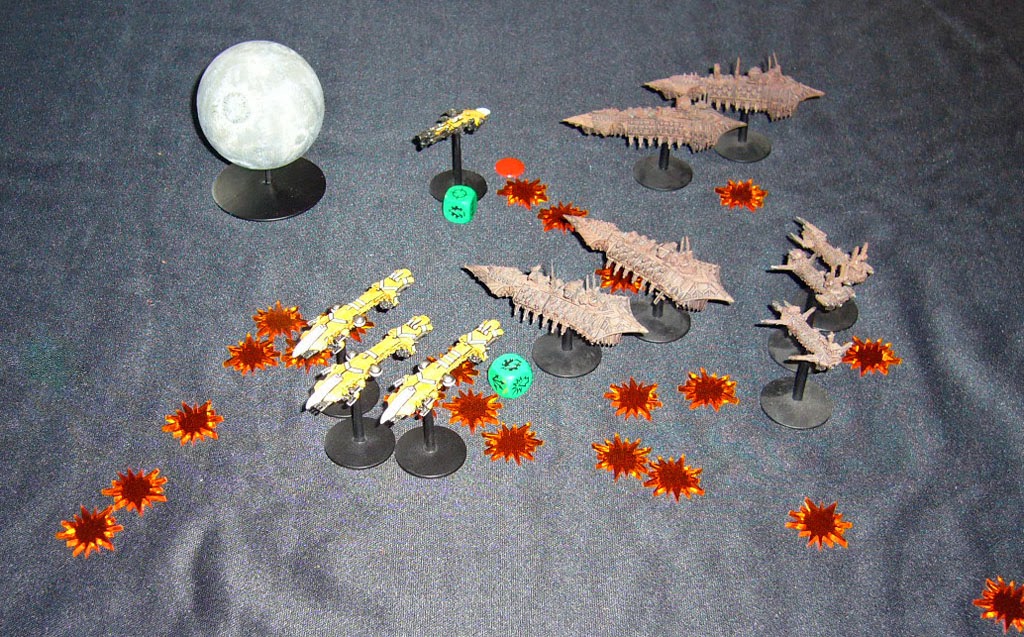
The scenario is a "Surprise Attack". This begins with the Chaos Fleet hanging out around a moon having breakfast or something, when suddenly my Tau fleet jumps in to provide a lesson in the "Greater Good"! Three Chaos squadrons to the left of the moon are on standby, two on the right are on alert. There are also 21 orbital mines in a rough half circle around the Chaos position.
My plan is to jump in and do as much damage as I can immediately, sending in the fighters to take out the mines and then quickly reloading and following up with bombers. My fleet has 22 launch bays (8 each on the Explorers, and 2 each on the Heros), which I will need to make the most of in this game.
My Tau jump in a line with Orcas, Defenders, Heros and Explorers from left to right. Everything except the Orcas locks on, and blasts the closest Murder Cruiser down to 1 damage point and sets it on fire. My fighters knock out the first six mines, the Orcas shoot down another. The Murder fails to put the fire out and explodes - but sadly does not damage any of the other ships.

The Chaos pass their leadership checks and come to alert status, beginning to swing around towards the Tau line. They destroy an Orca, and do some other minor damage. Another Orca is destroyed by a mine that gets too close (oops). My fighters take out another 7 mines. A flight of 6 bombers heads towards the Slaughter Cruisers.

Next turn my Explorers reload having to use the reroll, and send out another 3 fighters to deal with mines and 13 bombers headed for the Slaughters. The Heros fail their command check. I destroy a Chaos escort, but the rest of my firepower does little. The six bombers launched the previous turn make it to the Slaughters, as do some torpedoes from the Heros, but they do only minor damage as they Slaughters have braced for impact.

The Chaos close in destroying Tau escorts and crippling a Hero despite it bracing. They also shoot down two Tau bomber flights, and the last flight does no damage in its attack run. (Note a few Tau homing missiles behind the planet coming back around for another pass!)

My turn and a disaster occurs as I fail the reload order with the Explorers! That's 16 bombers doing nothing, and the Chaos escape the turn taking little damage.

Chaos turn and they close in for the kill, crippling the first Explorer, and teleporting and destroying a Defender after knocking down its shield.

My turn and I retaliate destroying the first Slaughter and a Chaos Escort.

Chaos turn, they swing around targetting the Explorers again, and dropping the first one to a single hit point despite me bracing for impact. They also kill my last two Orcas.

My turn I disengage with the crippled Explorer and reload with the Heros, finishing off the second Slaughter with close range rail gun, ion canon and shotgunned torpedoes.

Chaos turn and my remaining waddling Explorer takes stern and bow rakes from the four Chaos Cruisers! Boom! That's too much firepower to resist...

A hit and run teleport also kills a Defender, and another Hero is crippled. My Hero's are now unloaded, two are crippled, and they are unable match the speed and turning arcs of the remaining Chaos ships. I sound the retreat, congrats to Jesse on the win!
Well it was interesting to use the Tau for the first time. On paper they look ferocious with all those launch bays, but getting those to work right turned out to be trickier than I thought! Failing reload rolls was bad, I should have bought the extra rerolls perhaps! The Tau fleet is also quite slow and lacking in maneuverability, a factor aggravated by proximity to the planet, where the Chaos ships made the most of the gravity well to turn around very quickly and blow me to pieces. In hindsight I probably should have held back and thrown out as much ordinance as I could for as long as I could, rather than going for the tempting sneak hit at the start and getting caught up in a deadly melee near the moon! Next time!
Those Tau ships look cool. "The greater good"... shades of Hot Fuzz, me thinks!
ReplyDeleteCheers Nick!
DeleteWith the Tau, I would be careful squadroning the two Explorers. Needing to brace means they both brace: no reload that next turn! Also, I think deploying further back, maybe in a corner, and advancing slowly. Yeah, it seems re-rolls would have helped a bunch in this game! Love the battle reports!!
ReplyDeleteThanks Dan! Yes I'm in two minds about whether or not to squadron them and leaning towards not after this game. It's bad if you have to brace but on the other hand it seems a shame to miss out on the Leadership 9 for reloading! But in any case I'll be staying far away from close range Chaos fleets like this in the future...
DeleteYeah, keep fleet tight but Explorers apart. And re-rolls are important with LB heavy Tau fleets.
ReplyDeleteMinor detail about the Chaos fleet: the Chaos Lord MUST go on the most expensive ship.
Cheers, and actually I think I got my classes mixed up - thinking the Slaughters were the heavies (well they certainly are within 30cm!). Just edited it as pretty sure Jesse had his commander on the right ship, one of the Hades.
Delete