Sunday 15 October 2017

ADLG: Lysimachus vs Seleucus

Another game of ADLG using 28mm Successor armies. Matt arrived with Seleucid reinforcements in the shape of an elephant and archers, while I used the army of Lysimachus.

Seleucids end up attacking, and I have some useful terrain on my side of the table.

Seleucid mounted wing opposing my right.

Phalanx in the Seleucid centre with Galatians on each flank.

Elephant with Bowmen and Medium Spear opposing my left.

On my left I have some Light Cavalry, Lancers and Javelinmen.

Then my Phalanx in the centre.

Then Elephants with Medium Swordsmen on my right.


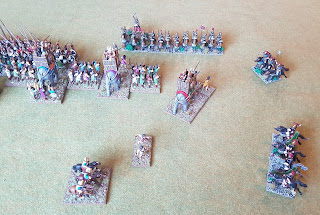
Seleucids advance, light cavalry riding wide to get around my right flank.

I advance to meet the Selecuids.

My lancers don't fancy facing off against the  Seleucid Elephant, bow and spear, and instead march toward my centre and right.


Seleucids close to bow range.

Given I'm going to be outflanked on my right, I charge in to try and break a hole with my elephants. 

A lancer rides to reinforce the right flank.
 
My other lancers aim for a gap in the Seleucid line that has opened to the left (my left) of their phalanx.


A unit of my medium swordsmen is destroyed by the enemy Phalanx immediately making a hole in the middle of my own line which isn't a good start.

And the Seleucids press home the attack charging into the elepahnts and medium sword with their own lancers.
 

And their Phalanx crashes into mine too, with medium spearmen moving over to guard their flank against my lancers. 

Seleucid bow shoot fairly ineffectively at my Javelinmen, and I'm happy to tie down these troops like this.


Battle in the centre.


I charge into the spearmen with my lancers but they hold.

While units on both sides take casualties in a melee down the line.


One of my elephants breaks a hole in the cavalry line, but my swordsmen are struggling to hold off the Seleucid lancers even with elephants helping them.

  My Lancers struggle on against the Spearmen. 

The Seleucid phalanx commander turns his file and charges into the flank of an elephant.


And the Seleucid elephant turns around and comes over to block the weak point in their line, backing up the spearmen against my lancers.

My right flank starts to crumble, though the Selecid lancers have now lost two units against the elephants.

But my flanked elephant and the remainder of my swordsmen are destroyed.

My lancers batter down the spear only to meet the enemy elephant.

Seleucid cavalry flank charges my elephants.


And the Seleucid elephant advances on my lancers.
 

One of my phalanx files destroys its opponent...

But too late as my army has reached its break point of 22/22. Seleucids are at 17/20 of their break point.


My remaining elephant at least manages to destroy another Seleucid cavalry unit before the end...
 

Close game but well done to Matt who managed to break my army with some bold cavalry attacks proving decisive!

Thursday 12 October 2017

BFG 1500: Craftworld Eldar vs Tau

Andrew and I decided to give BFG a try using some proxy fleets and a new (for us) Battlefleet Gothic Expanded Revised (BFG-XR) rules edition. An interesting game ensued, with dozens of attack craft dueling desperately between the capital ships!


I used my Kraytonian models as Craftworld Eldar with the following fleet:
  • 1 Void Dragon, High Admiral
  • 2 Wraithships, Pulsars, Launch Bays
  • 2 Wraithships, Weapon Batteries, Launch Bays
  • 2 Wraithships, Weapon Batteries, Launch Bays


Andrew used scratchbuilt laser cut models for Tau.  All Tau carriers were equipped with Torpedo Bombers except one of the Hero's. 
  • 2 Explorer Carriers, Admiral
  • 1 Explorer Carrier
  • 2 Hero Class Cruisers
  • 3 Orcas
  • 3 Orcas
  • 3 Orcas

Turn 1

A look at the table setup. Sun is to the side towards the camera. I win role for first turn, and decide to make the Tau move first.

Tau advance towards the sun and launch their Torpedoes and Torpedo Bombers.

Eldar close as fast as they can, and launch their Fighters. I figure I have to get to the Tau Carriers and disable them as fast as possible, otherwise I will be overwhelmed by the tide of Bombers. Most of my ships advance on Lock On orders, and three Orca Frigates are destroyed by Eldar fire.


Some Torpedo Bombers launch their missiles and return to refuel.

Eldar fighters start intercepting, shooting down Bombers and Torpedoes.

Successful intercepts for first turn means no Torpedoes get through.

My central Wraithships have braced for impact and only take a single point of damage from Tau Capital Ship Fire.

Tau advance and more Wraithships brace for impact as torpedoes arrive. I take two more points of damage and lose a sail (-5cm move) on one of them.

I close on the Tau Carriers. The far right Carrier loses 5 out of 12 damage and has its bridge destroyed (-3 Leadership permanently). Tau Ordinance attacks again, and while my Fighters deal with some of it, the closest Wraithship in photo below is crippled.


Tau Carriers flee along the sunward edge. The badly damaged Tau Carrier on the right manages to disengage successfully despite the destroyed bridge.

Carriers all reload and launch Ordnance again, and one of my closest Wraithships becomes a blazing hulk, the other becoming crippled.


My crippled Wraithship disengages, while the others move to attack the remaining carriers. Unfortunatley I am now moving up into the sun and solar wind so only going 20cm maximum (rather than up to 50cm when abeam to the sun, or 40cm when it is to my rear quarter). My Void Dragon lags behind at the rear. I damage the next Carrier only slightly, knocking out its shield as well, but my Wraitships take more damage as waves of Ordnance hit them.


Tau Carriers keep evading the best they can, reloading and launching more Ordnance and one of my Wraithships explodes with a 16cm explosion destroying an Orca but doing no other damage other than dropping shields.

I chase after the Carriers, but am unable to cripple another one. More Ordnance launches from the Carriers.

My Battleship lags too far behind to help my Wraithships against he Carriers, and instead has to target Orca Escort ships.

More Ordnance is launched and my remaining Wraithships are too crippled to continue to resist. The Eldar fleet disengages. Victory to the Tau!


Conclusion

An interesting game, with Tau managing to wear down the Eldar for the win. We tried different tactics for our Ordnance this game, still not sure we've got the best tactics sorted out though! My fighter screen was unable to hold off the neverending tide of Tau Bombers, and I took too much damage before I could disable the Carriers. In hindsight I needed to have planned better so as to be upwind with the solar wind (or at least not as far away as I was) and targeted the Carriers more decisively. My largest ship being out of position was a mortal mistake. The battle looked close nonetheless at a couple of points, especially when I smashed the bridge of the first Carrier, and I was one point off crippling a second Carrier. If the Tau had failed a reload or two the result might have been quite different too! Nonetheless, Tau Carrier fleets seem like fearsome beasts indeed!