Thursday 31 December 2020

To Ur is Human - Game 2

Another crack at To Ur is Human played Tuesday a week ago. See the previous post on this game here for a rundown on these rules.

This time we played using the "Blinds", idea in the rules, to hide our deployments.  


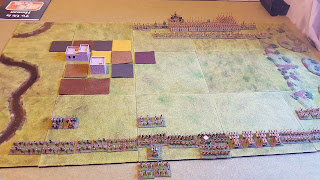
And blinds removed and armies revealed! Andrew has refused his right flank. 

Andrew had done lots more painting since last time, including more battlecarts! My force had an extra unit of battlecarts and lots of archers.

Andrew had lots of the spearmen and light infantry.

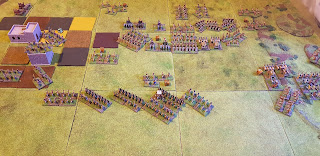
First moves, I throw back the enemy skirmishers, though they manage to frighten a battle cart unit! Another unit of my Battlecarts is doing a flanking move around the settlement on my left.


I rally, and the front battlecarts charge the line ahead of them hoping to frighten them.

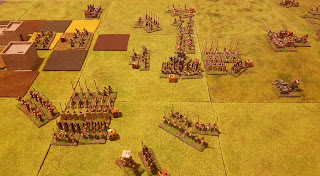
This works better than expected, the front shielded spearmen rout through their compatriots.  We were not sure exactly what to do here, but followed up the carts into the unshielded supporting spearmen, causing another fear test (I think this was correct), and then hacking them down with two rounds of combat because they couldn't flee through the routing shielded spearmen.

M other battlecarts charge the next unit, routing them too. 

These battlecarts pull back, but they have inflicted a lot of damage!


And once again, I forgot to take photos for a while! But as can be seen it has continued to go badly for Andrew's side, with my battlecarts and infantry routing his left flank, and his right isn't looking so good either!

Whereas my battlecarts plunged into and through his spearmen, my own spearmen repulse his battlecarts!

Here is the outcome of his battlecart attacks, remnants of one group pursued back into his lines by my victorious spearmen. My Royal Guard spearmen also manage to fend off the other battlecart group.

Final positions, a great slaughter by my battlecarts, and I've only lost a couple of units.

Here's a potential house rule Andrew raised after this game.

"Wonder if (house rule) we left attacking units in the adjacent square(s) - in terms of position.  Avoid trying to squeeze HI + supports + flank attack + target (HI + supports) all into one square.  Allow neighbours in the line an opportunity to join a successful defence in the first round.  Also would make which unit is in the square after clearer (frontal attacker)?  Would mean that a recoil (push back) left the flanking unit behind?"

Might try that in the next game, scheduled in a few days time.

Saturday 19 December 2020

Kings of War V3 Battlereport: Abyssals vs Undead

Another Kings of War game today, with first use of my Abyssals, which have had some newly painted models added over the last couple of months.


My list was:
  • 3 x Succubi Regiments with Lurker
  • 2 x Flamebearer Regiments with Sacrificial Imp
  • Moloch Horde with Sacrificial Imp
  • Abyssal Fiend
  • Despoiler Champion
  • Seductress with Enthral
  • Abyssal Warlock with Bane Chant, Drain Life
  • Manifestation of Ba'el

Nick's Undead list with Orc Ally was the following I think:
  • Skeleton Spearmen Horde
  • Skeleton Horde
  • Mummy Regiment
  • Wraith Troop
  • Revenant Knights Regiment
  • Revenant Foot Regiment
  • Liche King mounted, Bane Chant, Lightning Bolt
  • Two Necromancers, Bane Chant
  • Orc Axe Horde, Macwars Potion
  • Orc Axe Regiment
  • Orc Krudger on Chariot
  • Giant

Here's the deployment.  The objectives are underlined in white. Scenario is Salt the Earth, which means you can destroy an objective at the end of your turn if you control it (i.e. when you think you won't be able to hold it and want to deny it to the enemy). Whoever controls the most objectives at the end of the game wins.

First turn, Undead move first, and then I advance cautiously and firebolt the right most Skeleton horde with all my firebolt spells, doing 10 damage to them.  Mr Ba'el and Seductress fly over to my left with the vague idea of hunting down the Undead characters.


Turn two and the Revenant Knights and Orc Chariot smash into the Abyssal Fiend on my right, doing an enormous 18 wounds and killing him outright.

The Succubi behind him contemplate how to hold off the breakthrough...

My turn and Mr Ba'el and Seductress fly over the Undead infantry and  into the Liche King who is carelessly in the open (and also painting not finished so he should fight poorly). I figure this pair should rip him to pieces. Mr Ba'el is a giant crushing demon, and Seductress is a character assassin with her duelist ability (double attacks against individuals). Unfortunately rolls are terrible and the Liche survives... oh no!

More positively, firebolts from Warlock and Flamebearers wreck the first skeleton horde and it is removed.

Undead turn and multiple charge on the Succubi on my right. Succubi have ensare (-1 to hit them from front) and are in rough terrain so enemies are at -2 to hit them, except the Giant with Strider ability which ignores the rough terrain. But Succubi take seven wounds and are gone anyway.

Mummies turn around and are surged into rear of Mr Ba'el and and smash him to pieces. 

Seductress miraculously survives though!

It's all a bit grim looking for the Abyssals at this point!

I throw my remaining forces into the hordes ahead and hope for some luck... and on the left a Succubi regiment manages to catch and kill one of the Necromancers.

I do some damage against the hordes but the Revenants charge into the Flamebearers on my right and destroy them.

Skeletons concentrate on other Flamebearers and waver them.

But, my units fight back and break through, managing to turn to face the oncoming rear attack just in time. The Succubi regiment on my left is hit in the rear by surging Wraiths and destroyed. Losing the Succubi to kill the Necromancer wasn't worth it I think.

My Molochs and Flamebearers have regenerated many wounds, sacrificing their Imps. My other Succubi break the Revenant foot regiment with a flank charge.

But the Mummies and Wraiths catch my Succubi, and the Orc Chariot wavers my Warlock...

Never a good situation to be in... and the last Succubi regiment is gone.

In the background my Seductress has been darting about, and uses her Enthral spell to pull the Orc regiment off one of the objectives. They move back to reclaim it and she pulls them off again! The Liche tries to lightning bolt her but fails.

My Flamebearers have the central Dragon Egg objective, but that's it!

End of turn 7 and game is over. Abyssals one objective, the Undead have four objectives (it would have been five except for Enthrall from the Seductress!).

Conclusion

Well a tough but fun first game with the Abyssals. How did they do? My general plan of holding up the right flank and smashing the centre and left wasn't terrible I think, but it could have been better executed. The Abyssal Fiend I put in a poor position, and that quickly lost me the right flank. This Abyssal army can definitely shoot, removing a horde of Skeletons in two turns of spellfire, so that was interesting. I don't think trying to hunt down the Undead characters was necessarily a bad idea either, but a pathetic effort from these two below who couldn't even smash a little corpse on a horse! :) Going behind Undead and too close to them is always risky due to their magic movement with surge of course, as was demonstrated here!

Well, at least we got the Egg as a consolation prize before banishment back to the Abyss. :)

Lastly,  I will mention that Nick has also bought a 3D printer and here's some of the first pieces from it  - a Crypt and Skeleton. Very cool! Printer is a $450 NZ Ender he said.

Friday 18 December 2020

To Ur is Human - Playtest

A new Ancient system played with wargaming buddy Andrew Tuesday night. 
"To Ur is Human" rules, advertised as being "written specifically for games set in the period of the Mesopotamian city-states, such as Akkad and Ur. Using a gridded playing area and easy to learn innovative rules".

There is an excellent summary here on Palouse Wargaming Journal detailing some core mechanics, so I won't bother repeating these points.  I purchased the rules for $10 NZ from Wargame Vault and printed and bound them. I think Andrew said he ordered a printed copy which still hasn't arrived given postage timeframes to New Zealand. The other book is just some recommended reading on the period!

A question that might be asked is why you would need another ancient's rule system, and the answer is we don't. E.g. here is the the same period we played with Big Battle DBA rules.

At the same time, it is interesting to see different takes on wargaming, and especially for a narrower period. The design philosophy of these rules places an emphasis upon several features of warfare at this time that might be particularly characteristic, and significantly obfuscated/abstracted in other more generic rules. The characteristics are based upon the best interpretations we can make given our limitations in understanding these first human civilisations of course.

Features focused upon include (1)  the core mechanic whereby troops are in a state of fight/fright/flight, (2) the potentially devastating effect of "Battle Carts" (both combat effect and movement), and (3) the generally ponderous nature of armies more generally. 

All figures and terrain (apart from two buildings!) are Andrews. We played on a grid where each 25cm tile was effectively 9 squares (easy to see position at a glance). So the grid was 15x 9 squares, with 12x8 recommended as minimum for decent sized game. Grid movement adds some clarity to the game, though we also had a few questions about it at times (see below).

 On with the game. Here we see my light troops running up to target the enemy before retiring.

While my battle carts threaten on my left flank.

Any unit when charging or charged makes a fear test which may result in units being in a fight, fright or flight state, with effects which might be expected from those results. For example Battle Carts have a reasonable chance of "frighting" or "flighting" other troops even if they don't close.

Now as it turned out we got rather wrapped up in game and I forgot to take more photos for a while, (hence the change in light conditions as we switched from daylight to artificial lighting)!

As can be seen though, it has become a mess, with my battlecarts having swung around behind and through the enemy army and coming back out the other side.

On the right, a last archer fights to the death against some enemy medium infantry, as I send troops to reinforce. The enemy medium infantry have taken very heavy casualties from shooting. Shooting is  rather deadly to many troops in this period given the lack of armour or shields!


Disaster as my "Big Man" accompanies my unshielded spearmen and is killed against enemy shielded spearmen (who were in a fright state encouraging some aggression on my part).. Shields are the new superweapon of 3000BC, exceeded in fearsomeness only by the mighty Equid  (donkey) drawn carts of death. 

The carnage is heavy, but my forces break first.

I won't say too much more except we enjoyed the basic concepts, especially the fight/fright/flight mechanic, whereby troops are often having an effect without fighting (e.g. Battle Carts thundering around shaking morale), and shaken troops add to the confusion and mess.

A few things we were unclear on:
  1. Big Men allow rerolls, but of what? Combat dice, fear tests? Everything? Rerolling 12 combat dice (for example) seems very powerful, when you are already adding extra dice for the Big Man.
  2. Retreats - this caused the most confusion, it wasn't clear where units should have to retreat to, especially in multiple combats. What about if you are in flight state where do you run? Is it to the nearest board edge? Some greater specification here would seem useful, e.g. retreat directly backwards from frontal enemy, then towards board edge subsequently, which is what we ended up doing.
  3. Do you have to keep testing morale if you are in fright/flight state or is it optional?
  4. Light troops and when they can shoot was a bit confusing, if they test fear and shoot before retreating, do they get to do anything in their own turn, or do they just have to sit there a turn? We think they can't do anything at this point.
  5. Chargers from a diagonal, e.g. from rear/flank, do they hit flank or rear?
In terms of modifications we might be implement, troops seem rather inclined to stay to the last man at times, and we would be tempted to remove a unit if it drops to a single stand, not least because this makes it impossible to indicate if it is in fright or flight without use of counters otherwise. An exception would be made for battlecarts which are only two stands, and also limited in number and easier to remember the status of!

Anyway some neat concepts in this ruleset and recommend giving it a go if this is a period you are interested in! We are playing again next week.