After a first battle testing the controversial Scout Marine list, I decided to give them another run, and Andrew was happy to oblige by facing them with his Tau. I've also started painting the new Battlescene Buildings but didn't have them ready for the game. However I added a couple of other large buildings to the field instead.
Here's the Marine List:Marine Scout Horde 3000 POINTS
Codex Astartes (NetEA Tournament Pack 2013)
==================================================
SCOUT [200]
4 Scouts, Captain
SCOUT [200]
4 Scouts, Captain
SCOUT [150]
4 Scouts
SCOUT [150]
4 Scouts
SCOUT [150]
4 Scouts
SCOUT [150]
4 Scouts
SCOUT [150]
4 Scouts
SCOUT [150]
4 Scouts
WARLORD [825]
1 Warlord Class Titan
THUNDERBOLT SQUADRON [175]
2 Thunderbolt Fighters
DEVASTATOR [350]
4 Devastators, Supreme Commander
TERMINATOR [350]
4 Terminators
That's 12 activations, 2 off table (Terminators and Thunderbolts).Once again, I don't actually have 8 formations of Scouts so I was using Tactical Marines to represent them in this game.

Andrew's Tau List was as follows:
Crisis Suit Cadre [425], 5 Crisis Suits + Shas’O, 2 Gun Drones
Fire Warrior Cadre [350], 6 Fire Warriors + Bonded Team, 3 Devilfish, Skyray
Fire Warrior Cadre [325], 6 Fire Warriors, 3 Devilfish, Skyray
Broadside Group [350], 6 Broadsides, 2 Gun Drones
Pathfinder Group [200], 4 Pathfinders, 2 Devilfish
Pathfinder Group [200], 4 Pathfinders, 2 Devilfish
Recon Skimmer Group [175], 2 Tetra, 4 Piranha
Recon Skimmer Group [175], 2 Tetra, 4 Piranha
Recon Skimmer Group [175], 4 Tetra, 2 Piranha
Recon Skimmer Group [175], 4 Tetra, 2 Piranha
Barracuda Squadron [150], 2 Barracuda
Barracuda Squadron [150], 2 Barracuda
Orca Dropship [150]
A total of 13 activations, with 4 off table (Orca carrying Broadsides, and the two Barracuda formations).

Turn 1
My deployment consisted of four scout formations spread along the centre of the table and other formations behind, while the Tau are mostly held back behind cover.

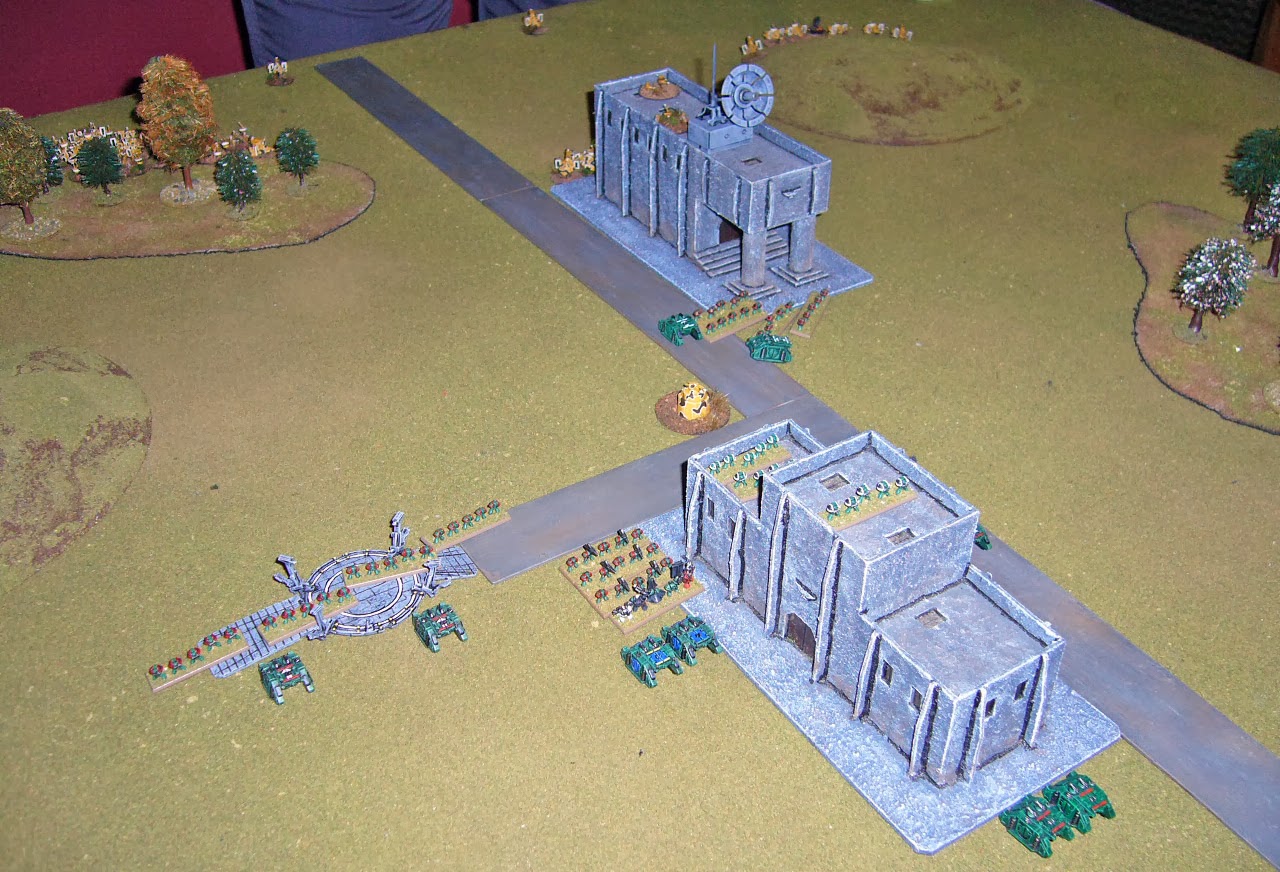
Here's a side view of the table.

Marines win the Strategy Roll and make the Tau go first. Both sides probe cautiously, with me gradually concentrating formations towards the radar building which is held by Tau Pathfinders. I'm also keen to hold these two buildings as they effectively secure two objectives and give a strong point to defend against Tau shooting. Fire from no less than six Marine formations eventually breaks the Pathfinders in the radar building, though they have taken no casualties, and retreat to the forest on my right.
On my left flank, the Tau start to concentrate their forces. First a Firewarrior Detachment advances and opens fire on my Scouts here. My overwatch fire kills one Firewarrior team, but I lose my Rhinos and a Scout stand.

Next a Tau Orca performs an air transport mission. My Thunderbolts intercept but the Orca shrugs off two hits. The Tau Broadsides disembark and eliminate the rest of my Scouts.

Here's the situation near the end of turn 1 looking from my left flank.

And looking from my base edge.

I make a crucial decision - to march the Warlord Titan down the road once the Pathfinders were cleared from the radar building, thus threatening the Tau Blitz and Tau formations hugging cover here.

Meanwhile in the forest on my right, the broken Tau Pathfinders are joined by the Tau Commander and his Crisis suit retinue. I march a Scout formation with Captain up to contest this forest. The Tau Pathfinders fail to rally despite using the Commanders reroll.

Turn 2
I teleport my Terminators down to the forest on the right flank, hoping to win Strategy Roll and smash the Tau Supreme Commander. I roll three one's on four dice so take 3 blastmarkers due to teleporting.

I win the Strategy Roll and launch a combined assault with the Captain of the Scouts ordering the Terminators to follow. Devilfish Transports countercharge forcing a Scout and Terminator to use Firefight rather than Close Combat values.

It's a messy combat, with me losing 2 Terminators, the Captain and another Scout stand, and the Tau losing 5 units. I win the combat, killing the remaining two Crisis suits in the resolution and leaving only two Drones from the Tau Commanders formation. (Just realised now as I am typing this that the remaining Pathfinders should have been wiped out as they were already broken! A temporary brain fade on both our parts! The Pathfinders did not rally for the rest of the game, but they did slow me down slightly.)

I then retain initiative with the Warlord, doubling towards the Tau Blitz objective and blasting a Tau recon formation killing all but one unit.

The Tau continue to push towards objectives and pick off Scout units and Rhino transports. Their other Pathfinder formation captures the central landing pad. Here's a view from the Tau baseline.

Broadsides and Firewarriors on my left flank both fail initiative tests and so are unable to exploit their breakthrough last turn. The other Firewarriors capture the left centre outpost.

View from my left flank.

Turn 3
I win Strategy Roll again. My Warlord advances and claims the Tau Blitz objective, firing and breaking another Tau recon formation as it does so.

I then retain with my Supreme Commander and Devastators, who advance and kill 2 of a Tau Recon formation. This Tau formation tries to activate but fails, and breaks for taking a blast marker. The broken Recon formation retreats to a position that will disrupt my advance.

My remaining Captain and Scout formation assaults the Pathfinders on the landing pad (the landing pad is from Dark Realm miniatures), to stop them contesting one of my Take and Hold objectives.

I lose 3 Scout stands for 2 Pathfinders, and break and retreat. Another Scout formation shoots and breaks the Pathfinders who only required one more blast marker to break. The Pathfinders retreat towards my Blitz.

My Thunderbolts ground attack the remaining two Drones from the Tau Supreme Commanders formation, but only kill one. I have to send another Scout formation to finish them off.

And then disaster... I've been so busy on concentrating on how I'm going to win, I forget to consider that I might also lose. The Tau gain Take and Hold and Blitz victory conditions, and I have Take and Hold, Blitz and Break their Spirit. But in flies the damned Orca firing its pitiful weaponry! It lands to contest the Blitz objective, meaning I no longer claim the Blitz or Take and Hold victory conditions!

View from my left flank.

Here's the view from the Tau baseline. There are so many Tau units all over the board (broken and unbroken), and I've lost so many transports that I can't get back to defend either of my own objectives that the Tau have captured! Nor can I get into position to shoot at the Orca with a measly two formations which would break it due to blast marker suppression! Win to Tau 2-1 (Blitz and Take and Hold, vs Break their Spirit). Well done Andrew!

Well a miscalculation on my part... the sensible (but boring!) strategy with this Scout army is to use the Warlord Titan on my own side of the table to defend two of my objectives thus denying the enemy victory conditions while providing some long range fire support. Instead I raced off down the road with it, thinking I would easily be able to out-activate the Tau and swing a few Scout formations back to contest my own objectives as necessary. As it turned out I left this latter move far too late and in the end couldn't achieve it in time! The Tau wisely ignored the Warlord Titan all game while blowing up my transports and picking off the most exposed Scout formations. The rather too bold move with by Tau Supreme Commander was the only real mistake.
Thanks for reading! Here's Andrew's more entertaining and in character report from the Tau perspective!
Tau After Action Report 2014.02.07
The arrival on planet of Imperial Titan class war engines meant the Tau forces under Shas’O Shas’len’ra needed to be rapidly re-deployed for blocking operations. Vast swarms of Gue'ron'sha [Space Marine, lit.Human Engineered Wind] Scouts were reported to be accompanying the Behemoths. Despite significant losses the Space Marine incursion was successfully repulsed. We regret to inform Aun't'au'retha [Ethereal Council of T'au] that Shas’len’ra [Cautious Warrior] did not survive the engagement.
This report is compiled from notes recorded on the sole surviving Kor'vesa [Shield Drone, lit. Faithful Helper] from the Shas’O Shas’len’ra Crisis Suit Cadre, picked up by a Kor-elan [Air Caste Support} Orca in the face of a Gue'la [Imperial] Warlord Titan near the prime sector control sentry tower.
Forces under command
Crisis Suit Cadre [425], 5 Crisis Suits + Shas’O, 2 Gun Drones
Fire Warrior Cadre [350], 6 Fire Warriors + Bonded Team, 3 Devilfish, Skyray
Fire Warrior Cadre [325], 6 Fire Warriors, 3 Devilfish, Skyray
Broadside Group [350], 6 Broadsides, 2 Gun Drones
Pathfinder Group [200], 4 Pathfinders, 2 Devilfish
Pathfinder Group [200], 4 Pathfinders, 2 Devilfish
Recon Skimmer Group [175], 2 Tetra, 4 Piranha
Recon Skimmer Group [175], 2 Tetra, 4 Piranha
Recon Skimmer Group [175], 4 Tetra, 2 Piranha
Recon Skimmer Group [175], 4 Tetra, 2 Piranha
Barracuda Squadron [150], 2 Barracuda
Barracuda Squadron [150], 2 Barracuda
Orca Dropship [150]
Pre-Battle Planning
A lack of significant long-range heavy weaponry led to a decision to avoid contact, as much as possible, with enemy Titans. Where possible Pathfinder units would maintain contact in monitoring/blocking positions, Tau’va [for the Greater Good]. Some disruption fire missions were also planned to target the enemy war engines.
Highly mobile mechanized scouting formations were considered vulnerable to Seeker Missile fire. It was therefore planned to set up a Marker Light watch line across the Battlefield to allow the transport vehicles to be targeted.
In previous operations the Shas’Saal [Cadet] Fire Warrior Cadres were observed to only achieve relatively poor accuracy with their Pulse Rifles. These Cadres were dispatched to the Sept Shas’retha [Fire caste academy] shooting ranges to address this issue. Unfortunately the urgent re-deployment meant that these shooting drills were not extended to operations under simulated battlefield conditions. The Fire Warrior Cadres were considered sufficiently trained to be able to assault properly prepared isolated Gue'ron'sha Scout Formations.
[Titan: Keep out of line of sight/range of Titan. Try to place it inside the 10 cm zone of control of a scout unit to constrain its actions. A blast marker might stop it from activating or force a commander re-roll.
Marine Scouts: Use Seeker Missiles to kill the Rhino Transports to reduce mobility for formations. Use Pathfinder sniper fire to target Scout Captains to reduce chance of coordinated assaults.
Fire Warriors: I realized I had mis/not read that Fire Warriors primary shot was AP4+. Still have not managed to find a solution to the Fire Warriors rolling ones on Initiative Rolls though.]
Battle Report
Tau Forces were deployed very cautiously, well back from the Space Marine battle lines, with screening formations on the left flank and a main thrust up the right flank. Initial enemy moves saw the Imperials pushing down the highway on our left flank. Initial contact with enemy scouting formations were effective at slowing the enemy advance.
Stunning shooting from the initial Barracuda over-flights confirmed that their time on the target ranges had been well spent [3 kills on the left flank Scouts broke them and cleared that Take and Hold objective].
Deployed in a built up area the left flank Pathfinder Group continued to function throughout Dec One under intense enemy fire [In turn one it took 6 formations firing at them to accumulate enough BMs to break the formation; no kills]. They eventually withdrew to positions around the left flank objectives. Before they had a chance to re-organize [failed their rally roll, and the commander re-roll] Dec Two saw them attacked by a large combined assault spearheaded by Gue'ron'sha in Dreadnaught Armour. The Pathfinders were forced to retreat again and took up blocking positions that they subsequently held throughout the rest of the battle.
The enemy titan marched straight down the road threatening the central group of Tau forces deployed to cover our Sentry Tower Sector Command Post [Blitz Objective]. In accord with the instructions of Shas’O Shas’len’ra formations began moving away from the Titan and continued to engage more exposed Scout formations. The Shas’O Crisis Suit Cadre itself embarked on a wide outflanking move rather at odds with caution implicit in Shas’len’ra adopted name [Cautious Warrior]. [OK, this was probably a crazy move, which I instantly regretted, but if the left flank pathfinders had rallied, the presence of the Shas’O would have allowed better command and control in the subsequent turn. As it happened the re-roll failed, the Space Marines won initiative by one, and the intermingled formations got crunched].
The superb Kor’elan [Air Caste Strong/Support] continued with the Orca deployment of at Broadside Group on the right flank, the destruction of another Space Marine formation and the capture of the two right flank objectives.
At this point the battle record of the engagement broke into fragmentary scraps. It would appear that the Shas’O, who had been fighting in the front line was cut down during a withdrawal from close combat with a Terminator Detachment. [Also I forgot to keep notes]. A collapse in communications with Kor [Air Caste] elements saw all air formations stand down during Dec Two [three ones on initiative].
Throughout the rest of the battle the Warlord Titan hunted down Tetra and Piranha formations. These sacrifices for the Greater Good kept the beast occupied and allowed more capable combat formations to continue to move towards the enemy’s base of operations. Desperate and increasingly less coordinated assaults by enemy scout formations were fought off as remnant Pathfinder units moved into blocking positions.
Particularly interesting, in terms of the extant battlefield record, was the pursuit of the Gun Drones previously attached to the Crisis Cadre. [It took 3 or 4 successive activations before Mark managed to gun [sic.] down the last units of the BTS formation, mostly be an application of BMs]. A final Orca landing was enough to retrieve the last [hypothetical] remnants of that formation and at least keep our supply lines to the forward troops open [contesting the Tau Blitz, and denying T&H; what a great little unit].
After a hard fought battle we can finally celebrate and declare Shas’shi
[Victorious Warriors], but lament the death of Shas’o Shas’len’ra and many of his Pathfinder Shas’ui [Veterans]. The threat of the titan backed Space Marine Scout Horde has be successfully repulsed.
Shas’vre Kauyon [Commander Patient Hunter]
Battle Game Notes
The Marine Scout force had remarkably little AT power to dent a mechanized formation.
They needed more than one formation to be reasonably certain of winning an assault. But this combined assault approach burns through activations pretty quickly.
The lack of much effective AA was definitely a weakness for the Marine Force.
Finally the Marine Scouts found it difficult to inflict any real damage when shooting. I was pretty careful to keep back wherever possible. Mark might have made more use of infiltrate to get formations into FF range for some assaults.
The Tau had nothing effective to deal with the Titan. So leave it be!!
Time for more “patient hunting” from my Crisis Suit Commanders in future!!
And I am very keen to get some more Orcas lined up on the laser cutter!!


