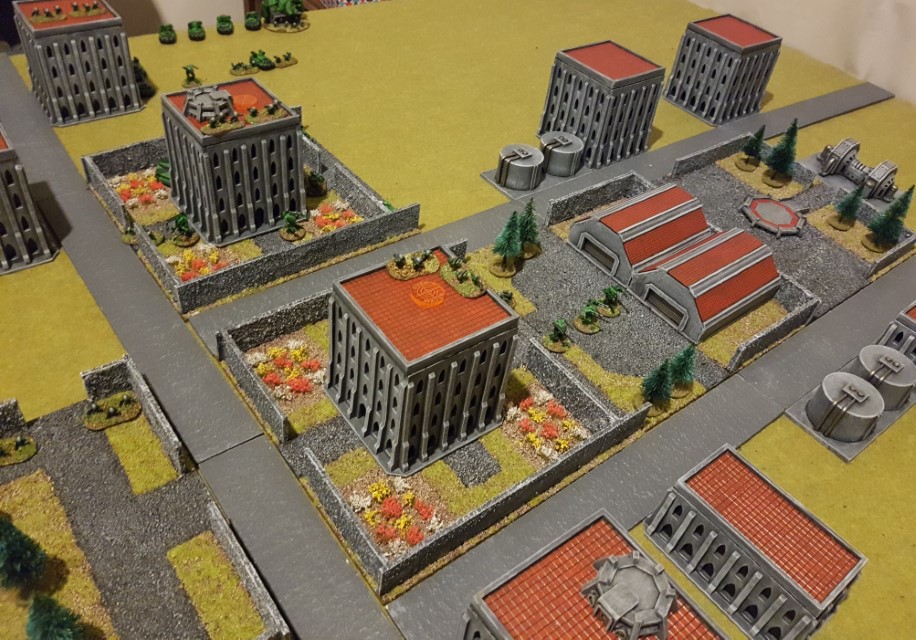
An unpublished battle, left in draft and not published until 5 years later, but here are the pictures!
Showing posts with label Battle Report Epic. Show all posts
Friday, 15 January 2021
Friday, 23 August 2019
Epic3K: Airborne Orks vs Dreadnought Marines
Been a while since I played an Epic game, so time to hit the table again. Airborne Orks vs Dreadnought heavy Marines.
I wanted to an airborne list using my three Vanguard Landas, which I haven't done before:
MEKBOY STOMPAMOB [500]
Supa Stompa, 3 Stompa
WARBAND [200]
2 Nobz, 6 Boyz, 2 Grotz, Warlord
WARBAND [200]
2 Nobz, 6 Boyz, 2 Grotz
WARBAND [200]
2 Nobz, 6 Boyz, 2 Grotz
MEKBOY GUNZMOB [175]
5 Big Gunz, Oddboy
MEKBOY GUNZMOB [175]
5 Big Gunz, Oddboy
MEKBOY GUNZMOB [175]
5 Big Gunz, Oddboy
MEKBOY GUNZMOB [175]
5 Big Gunz, Oddboy
BLITZ BRIGADE (BIG) [250]
8 Deth Kopta
LANDA [200]
LANDA [200]
LANDA [200]
FIGHTA SKWADRON [200]
4 Fighta Bomba
FIGHTA SKWADRON [150]
3 Fighta Bomba
Andrew used his army of CinC minatures for the Iron Hands list:
3000 Iron Hands v.1.2
400 4 Tacticals, Venerable Dreadnought Supreme Commander, 2 Dreadnoughts, Drop Pods
350 4 Tacticals, Sergeant, Venerable Dreadnought, Ironclad Dreadnought, Drop Pods
350 4 Tacticals, Techmarine, 3 Hellfire Dreadnoughts, Garrison on Foot (1 Rhino?)
275 4 Tacticals, Sergeant, 2 Siege Dreadnoughts, Garrison on Foot
175 4 Scouts, 2 Rhinos, Razorback
425 4 Tacticals, Sergeant, 2 Rhinos, Razorback, 3 Hellfire Dreadnoughts, Hunter
275 4 Whirlwinds
200 Iron Hands Strike Cruiser
200 2 Storm Talons
Here's the battelfield, with a large built up area in the centre and right and some hills and forests off to the left. Marines chose corner deployment and picked top right corner.
A look at the city in more detail.
Marines begin with planetfalling three formations on my blitz objective, and they wipe out the three Gunzmobs here without losing a marine.
My Stompa Mob approaches the town.
And I begin air attacking the defenders of the Marine Blitz.
The first air assault by the Orks breaks the defending infantry and their accompanying firepower based Dreads.
And the second takes out the Marine Whirlwinds. The Marine fighters are also shot down, and the Hunter is destroyed, leaving the Marines without air defence.
End of turn one a humiliating loss to the Dethkoptas, who end up losing 1 Kopta to Marine scout in firefight, and doing no damage in return despite support fire from the Stompa mob! Disastrous combat resolution sees another 4 Koptas disappear!
End of first turn, both sides securely holding each others Blitz objectives!
Lots of Marines around my base...
Lots of Orks around the Marine base...
Turn 2 the Ork air dominance continues with another air assault into the town by a Warband capturing the Take and Hold Objective.
And the Stompas engage and wreck the Scouts and capture the other Take and Hold Objective. Other Marines fall back through the town avoiding close assault mobs, and are unable to damage the Stompa mob sufficiently with AT fire.
Turn 3 winning the Strategy roll for the second turn in a row for the Orks, the Supastompa sustain fires at the central Marine formation and melts two Dreads and two Marine Squads with its macro guns.
The Marines are heavily out-activated now, and unable to contest their own objectives, while an Ork Landa survives overwatch fire to contest one of the Ork ones. Victory to Orks 2-1 with Take and Hold and Blitz, to Blitz for Marines.
Conclusion
An interesting game using the Landas, which I haven't used so many of before. They are quite brutal with a warband assaulting from them. Also tough for the Marines where all formations were quite slow and unmaneuverable, they would have benefited with one to two more faster units perhaps, or guarding the Blitz with some close combat Dreads. My Ork list being so infantry heavy other than the Stompas, meant the AT firepower in the Marine units often didn't have good targets too. My Landa's also meant I got the victory easily enough on turn 3 by contesting once I had secured the Marine obejectives.
Sunday, 11 November 2018
Epic 4K: AMTL vs Skitarri 2.1
Another outing with Skitarri list, this time vs AMTL (by special request Greg!)
Here's the AMTL list, with some proxying of weaponary on some of them.
Incompertus, 4000 POINTS
Legio Gryphonicus (NetEA v3.24 *APPROVED*) ==============================
WARLORD TITAN [875]
Carapace Landing Pad, 2 Quake Cannon, Legate, Laser Burner
WARLORD TITAN [675]
2 Plasma Blastgun, 2 Vulcan Megabolter
REAVER TITAN [700]
Carapace Landing Pad, 2 Quake Cannon
REAVER TITAN [600]
2 Turbo-laser Destructor, Laser Burner
WARHOUND TITAN [300]
Turbo-laser Destructor, Plasma Blastgun
WARHOUND TITAN [300]
Turbo-laser Destructor, Plasma Blastgun
WARHOUND TITAN [275]
Vulcan Megabolter, Plasma Blastgun
WARHOUND TITAN [275]
Vulcan Megabolter, Plasma Blastgun
Here's the Skitarri list used by Andrew, Majoris being proxied by double tanks.
| 275 | 2 Secutors, Magnus, 8 Hypaspists | |
| 325 | 2 Secutors, 8 Hypaspists, Ordinatus Minorus (Assault Pod) | |
| 325 | 2 Secutors, 8 Hypaspists, Ordinatus Minorus (Assault Pod) | |
| 225 | 2 Secutors, 8 Hypaspists | |
| 225 | 2 Secutors, 8 Hypaspists | |
| 125 | 4 Crusader Robots | |
| 450 | 3 Ordinatus Minorus (2 Gattling Cannon, Volcano Cannon) | |
| 450 | 3 Ordinatus Minorus (2 Gattling Cannon, Volcano Cannon) | |
| 450 | Ordinatus Majoris (Sonic Disrupter) | |
| 450 | Ordinatus Majoris (Sonic Disrupter) | |
| 500 | Ordinatus Majoris (Armageddon) | |
| 200 | 2 Avenger Strike Fighters |
Turn 1
Setup below. Armageddon is in the Skitarri centre, Sonic Disruptors both on their left flank (right of photo below).
First activation, I advance the Gatling Warlord and target the front infantry using all weaponary, killing three of them. I figure I need to blast away the front screen to get to the Majoris units and neutralise them, especially wanting to take out the Armageddon as quickly as possible.
The Skitarri then break two of my Warhounds with the Sonic Disruptor Majoris using the templates to get two formations. Oops. No damage but broken isn't good.
Artillery Titans rain down artillery fire, killing Hypaspists.
The Minoris and Armageddon gang up on the lead Warlord. The Minoris strip 3 shields. The Armageddon has to double to get it in range, and it is in cover so needs 5's to hit. But it gets luck with 3 hits and 8 damage which leaves the Warlord with only 3 hits remaning, and a reactor breach, but still not broken.
Then disastrously on top of this, the other two warhounds are too close together and the other Majoris Sonic Disruptor breaks them too!
End of turn, two Warhounds remain broken and two rally.
Turn 2
Skitarri win Strategy Roll, and the Armageddon destroys the lead Warlord. The Skitarri Ordinatii roll forward blasting anything in their way and my Titan legions are sorely lacking a few volcano cannons to scare them in return, settling instead for killing more infantry with the Artillery Titans. The Reaver artillery Titan is broken by Minoris and retreats.
Turn 3
AMTL win Strategy Roll, and on the left flank the Reaver wrecks a Corvus Minoris and its passengers.
Efforts to slow down the advancing Minoris on the other flank are futile though.
Warhound on the right flanks the Minoris but is unable to do damage.
Minoris continue to advance, and another Warhound is destroyed.
Warhound that had advanced on the right is broken due to blast markers. Unable to contest objectives, AMTL loses due to Skitarri achieving Take and Hold and Defend the Flag victory conditions.
Artillery Warlord holding firm but not able to do enough this game...
Nor the Artillery Reaver.
Two Titans lost.
Skitarri casualties.
Conclusion
A rather shameful outing for the AMTL! There were definitely some powerful toys in the Skitarri arsenal, but poor positioning and poorly thought out aggression was also a problem for my Titans here. I should have played defensively utilising the artillery, and counterpunching with other Titans when the Skitarri tried to approach, aiming for an attrition victory.
I also thought 4 Turbolasers, and 6 Plasmaguns on top of other firepower would be enough to deal with some War Engines but it was an undergunned force and the Ordinatii were able to move largely with impunity. Sonic Disruptors were able to auto-break Warhounds and range on Ordinatti units outclassed that of the AMTL leading to some awkward and limited options.
Back to drawing board with AMTL, must paint up a few more units and magnetise options!
Sunday, 28 October 2018
Epic 4K: Skitarri vs Tau
Another test of Skitarri 2.1 list vs a Tau list with air assault capability this time.
Incompertus, 4000 POINTS
Gryphonne IV Skitarii Legion (NetEA 2.1 (Approved Candidate version))
==================================================
ORDINATUS MAJORUS [550]
1 Ordinatus Majorus, Ordinatus Golgotha (Hellfire Missiles)
ORDINATUS MINORUS [600]
2 Ordinatus Minorus, 2 Minorus with Quake Cannon, Minorus with Carapace Landing Pad
ORDINATUS MINORUS [450]
2 Ordinatus Minorus, 2 Minorus with Gatling Blaster, Minorus with Volcano Cannon
ORDINATUS MINORUS [450]
2 Ordinatus Minorus, 2 Minorus with Gatling Blaster, Minorus with Volcano Cannon
SKITARII DEMI-CENTURY [425]
2 Secutor units, 8 Hypaspist units, Magos Character, Minorus with Support Missile
SKITARII DEMI-CENTURY [325]
2 Secutor units, 8 Hypaspist units, Minorus with Corvus Assault Pod
SKITARII DEMI-CENTURY [225]
2 Secutor units, 8 Hypaspist units
SKITARII DEMI-CENTURY [225]
2 Secutor units, 8 Hypaspist units
SAGITARII DEMI-CENTURY [275]
5 Sagitarii units, 5 Rapier Laser Destroyer Unit
ORDINATUS MINORUS [475]
2 Ordinatus Minorus, 2 Minorus with Volcano Cannon, Minorus with Gatling Blaster
Tau list, no Supreme Commander this time, and a massive BTS formation.
I marshal advancing the formation and restoring shields.
On the right flank, my Minoris take fire and no damage, but then advance...
... and destroy the Tau Hammerheads.
Tau Barracudas strip shields from the Corvus Minoris again.
And end of turn, first Tau air attack lands...
Then another air drop on the next flank...
...another crossfire and Hypaspist formation is left with only two units remaining.
Lastly Tau Spacecraft arrives (represented by AX-10 here), and destroys the Corvus Minoris and last Minoris from the wrecked right flank formation.
End of turn.
My Sagitarri have moved to the central building.
Crisis suits on the other flank cross fire a Hypaspist formation, but do little damage and retreat to the woods with their jump jets.
I marshal my freshly damaged Minoris formation forwards restoring shields and removing some blast markers.
I also engage and almost wipe out a Pathfinder formation, as Barracudas target my Hypaspists.
Tau advance and target my Sagitarri but do little damage.
More fire is exchanged with little extra effect, and the turn ends.
Infantry from both sides contest the central buildings, and both sides take significant casulaties.
I switched out the Plasma Destructors for some Volcano Cannons, and mixed them into other formations rather than keeping them separate. Ordinatus artillery formations were again at more points. Figures once again a combination of Guard and Chaos proxies.
Incompertus, 4000 POINTS
Gryphonne IV Skitarii Legion (NetEA 2.1 (Approved Candidate version))
==================================================
ORDINATUS MAJORUS [550]
1 Ordinatus Majorus, Ordinatus Golgotha (Hellfire Missiles)
ORDINATUS MINORUS [600]
2 Ordinatus Minorus, 2 Minorus with Quake Cannon, Minorus with Carapace Landing Pad
ORDINATUS MINORUS [450]
2 Ordinatus Minorus, 2 Minorus with Gatling Blaster, Minorus with Volcano Cannon
ORDINATUS MINORUS [450]
2 Ordinatus Minorus, 2 Minorus with Gatling Blaster, Minorus with Volcano Cannon
SKITARII DEMI-CENTURY [425]
2 Secutor units, 8 Hypaspist units, Magos Character, Minorus with Support Missile
SKITARII DEMI-CENTURY [325]
2 Secutor units, 8 Hypaspist units, Minorus with Corvus Assault Pod
SKITARII DEMI-CENTURY [225]
2 Secutor units, 8 Hypaspist units
SKITARII DEMI-CENTURY [225]
2 Secutor units, 8 Hypaspist units
SAGITARII DEMI-CENTURY [275]
5 Sagitarii units, 5 Rapier Laser Destroyer Unit
ORDINATUS MINORUS [475]
2 Ordinatus Minorus, 2 Minorus with Volcano Cannon, Minorus with Gatling Blaster
Tau list, no Supreme Commander this time, and a massive BTS formation.
| 525 | FW Cadre, 12 Fire Warriors, Ethereal, Bonded Team, 2 Pathfinders, 2 Gun Drones, Devilfish | |
| 325 | FW Cadre, 6 Fire Warriors, 3 Devilfish, Skyray | |
| 325 | FW Cadre, 6 Fire Warriors, 3 Devilfish, Skyray | |
| 325 | 6 Crisis Suits, Shas'el | |
| 325 | 6 Crisis Suits, Shas'el | |
| 200 | Pathfinder Group, 4 Pathfinders, 2 Devilfish | |
| 200 | Pathfinder Group, 4 Pathfinders, 2 Devilfish | |
| 200 | Pathfinder Group, 4 Pathfinders, 2 Devilfish | |
| 200 | Pathfinder Group, 4 Pathfinders, 2 Devilfish | |
| 225 | 4 Railhead Hammerheads | |
| 175 | 4 Tetra, 2 Piranha | |
| 175 | 4 Tetra, 2 Piranha | |
| 200 | Protector Class Cruiser | |
| 150 | Orca | |
| 150 | Orca | |
| 150 | 2 Barracuda | |
| 150 | 2 Barracuda |
Turn 1
Deployment as below. The Tau BTS is holding the central buildings and ruins.
I win Strategy Roll, and Minoris Support Missile fires at the BTS but only killing one unit (could only get 5 under the templates due to good spacing).
The Tau target the Corvus Minoris, stripping it's shields and damaging it with a co-ordinated fire involving Hammerhead Tanks.
I marshal advancing the formation and restoring shields.
On the right flank, my Minoris take fire and no damage, but then advance...
... and destroy the Tau Hammerheads.
My two other Minoris formations on the left flank advance and target the Tau BTS formation killing more units. I also manage to line up two volcano cannons to target the Ethereal and kill him, removing fearless ability from the formation.
Amazingly after all the fire, the Tau BTS has only just broken though! It retreats to the backfield, taking more fire from the Minoris Artillery and suffering more losses. My Majoris artillery manages to wreck a pathfinder formation.
Tau Barracudas strip shields from the Corvus Minoris again.
And end of turn, first Tau air attack lands...
... and with crossfire wrecks the Minoris formation leaving it with only one damaged Minoris remaining.
Then another air drop on the next flank...
...another crossfire and Hypaspist formation is left with only two units remaining.
Lastly Tau Spacecraft arrives (represented by AX-10 here), and destroys the Corvus Minoris and last Minoris from the wrecked right flank formation.
End of turn.
My Sagitarri have moved to the central building.
Turn 2
Tau win Strategy Roll, and Crisis suits destroy a Minoris and strip shields from the rest of the formation.
Crisis suits on the other flank cross fire a Hypaspist formation, but do little damage and retreat to the woods with their jump jets.
I marshal my freshly damaged Minoris formation forwards restoring shields and removing some blast markers.
I also engage and almost wipe out a Pathfinder formation, as Barracudas target my Hypaspists.
Tau advance and target my Sagitarri but do little damage.
My Minoris artillery breaks the left flank Crisis formation, killing three of them. The Majoris Artillery only kills a single unit from the right flank Crisis formation.
More fire is exchanged with little extra effect, and the turn ends.
Turn 3
Tau win Strategy Roll again. Crisis Suits jet forward and target the Minoris artillery but fail to damage them.
Infantry from both sides contest the central buildings, and both sides take significant casulaties.
My Minoris roll forward to a Take and Hold Objective and destroy a couple more Tau formations before they are in turn broken.
More fire is exchanged, but formations on both sides are suffering from suppression and casualties and the game shifts to a battle of slower attrition and positioning.
Turn 4
I throw my Supreme Commanders formation into the central buildings to prevent the Tau gaining "They Shall Not Pass" and "Defend the Flag" and both sides concentrate on doing as much damage as possible.
Game fails to go to turn 5, and then the game is over. Tau have one objective (Take and Hold), Skitarri none. Victory points are approximately Skitarri 1600, and Tau, 1300.
Conclusion
A closer game this time, though still a Skitarri victory by Victory Points. I thought it would be easy to get the Tau BTS formation after I killed the Ethereal. However after the air drops I felt I needed to redirect my artillery fire to prevent being overrun at my Blitz, and couldn't get the last three units from this Tau BTS formation all game. The Tau air drops were quite devastating, especially with crossfire and some favourable dice rolls but then they were blunted by less favourable circumstance and return fire. Volcano cannons were of course overkill against almost anything in the Tau list, but still useful with their range and power. They would have been even more useful if Tau had taken Mantas of course!
Once again this game I frequently used marshal actions to recover shields and remove blast markers and this was an effective tactic. There were many activation failures as blast markers accumulated and Skitarri were reduced to holding the central area and batting away the Tau attacks. I made sure I threw enough weight into the centre that Tau couldn't get an easy victory with 'Defend the Flag' or 'They Shall Not Pass' though, meaning Victory Points would be decisive and likely in favour of Skitarri as they turned out to be. Artillery formations once again very tough formations to take on effectively and preserved Skitarri Blitz and BTS well.
Subscribe to:
Posts (Atom)
%2B(1024x470).jpg)
%2B(1024x707).jpg)
%2B(1024x700).jpg)
%2B(1024x712).jpg)
%2B(1024x762).jpg)
%2B(1024x566).jpg)
%2B(1024x725).jpg)
%2B(1024x695).jpg)
%2B(1024x625).jpg)