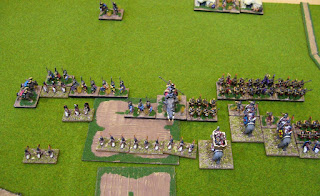
Basing finished and 1500 points of Free Dwarves finished. Just under two weeks and pretty happy with the result. :)
This is just the
Dwarf Mega Army from Mantic, minus 20 Ironwatch and 5 Sharpshooters, and plus three extra characters (Herneas, Flamepriest, and Packmaster), in order to make a Free Dwarf Army.
Note: for any who know Dwarves - yes the Warsmith and Organ Gun are Imperial Dwarf units (as are Sharpshooters), so won't be in the army, for now! But I painted them up the Warsmith given he came in the box, and the Organ gun can be switched to a cannon, so included in the photo.

I will do a more detailed look at the army, including list building and expansion in a separate and final post in this series. But first this post, which will look at basing technique in some detail...
Basing?
How to base? I've added quite a detailed post on this, as it's something people often have questions about. This is just one way of doing it that I find effective, but there are many other ways of course.
One of the reasons people like Kings of War is multibasing. This saves the cumbersome chore of setting up hundreds of individual figures each game as you needed to do in older systems like Warhammer. As newcomers to that system often remarked, these individual figures functioned as nothing more than wound tokens on a regiment base and often led to battles between ugly empty looking movement trays. These perceptions contributed to poor sales and the eventual killing of Warhammer by GW unfortunately. This is sad, but after using multibasing for a while, I have to admit that going back to movement trays and individual figures feels like about as much fun as shifting from movement trays to the time before movement trays - if anyone remembers that far back!
As to where you get multibases, there are ones made for Kings of War by Mantic like these which you can also put your individually based models on (I use these for my old Warhammer armies which are still individually based), or MDF bases like these are what I used here.
Some people create beautiful and elaborate dioramas, with highly scenic multibases. I prefer my own bases to blend in with the tabletop more, so go with the style shown above. People have already made some very good videos and posts on multibasing - see here on the Mantic site for just a few examples. A very common method is to do a scenic base and finish this, and then stick the figures on afterwards. This is fine, though earlier Mantic figures like my Dwarves came with plastic bases you would have to chop off to do that. But having the bases suits me because I'm going to glue the figures on the bases and then complete the basing texture, ensuring a very solid attachment!
Here's the steps to doing that...
Firstly I put some of the basing material on bases between models feet, glued on with PVA/white wood glue. This takes only a few seconds per model and saves having to reach these tricky spots when they are all on the base. The basing material is just the brown basing material from Army Painter, though brown railroad ballast does the same job and is probably cheaper.
Then it is on to fitting the models to their bases. The artillery are dry fitted (testing position without glue), then crew are glued in place onto their wooden MDF bases. Note I paint the top of the MDF bases black before sticking figures on.
The war machines themselves and their ammo chests will be glued on with superglue after the rest of the basing is finished - the one exception to all the other models in the army!

Next the infantry regiments. Kings of War does not have a set number of models per base, rather it is the "Rule of Cool". I.e. you should put what looks aesthetically pleasing for the figures you have, though still making it clear to the opponent what sort of unit you have. Having at least half plus one of the number of the number of figures in a unit is a typical minimum.
There is also a guideline called "Preferred Model Count" which is aiming for at least 75% of the figures the unit would have at full strength, if you can. That is what I'm aiming for here. The reason for going for this reduced number is that the models rank up more naturally, and figures don't overhang the base - which can be annoying in play, and increases risk of damage to the models. It is not that easy to fit on even this reduced number though!
Once again I'm dryfitting these Shieldbreakers before gluing. Here are 15 on a base, I'd hate to try and fit the full 20, and expect 12 would also look fine as three rows of four. The models are quite hefty!
The Rangers, a real challenge to get 15 of these on with all the xbows! Firing position goes in the front two ranks, at rest in the rear.
Gluing into place with PVA.
Everything based and some extra white glue slopped on to make sure they are really secure! The Ironclads are based up in regiments, two of which can be joined together to fight as a horde if desired for a game.
Note: One good point about MDF bases and wood glue, is that should you ever want to rebase (goodness forbid that being necessary!) you can easily do so. Just soak the base in a water up to the models feet overnight. The base and glue will disintegrate and the models will come off easily.
Left for several hours and mostly dry and ready for the next stage...
Back to wood glue, which is put first between the ranks on the base, here using an old brush and splodging it around up to the figure bases. This is why the bit between their feet was done earlier, make this step much easier!
Then the rest of the base, and a few bits of cork (also Army Painter) are scattered on as rocks.
Then the base is dipped into the basing material and swished around, until all the glue is covered.
Note: If you get any basing material onto the figures at any stage, this is easy to fix. Just wet it with water, and wait until the glue softens then wipe off the offending material with an old paint brush.
Ranger's turn.
And done and wait for it to dry and then brush and shake off the excess. A quick drybrush of the base with bone/buff coloured paint helps bring out the texture a bit more if you want, and I did this here. I paint the edges of the base a consistent brown too.
Last step, splodging on some white glue in places for the static grass to adhere to. This is done quickly and leaving plenty of the other ground colour showing through.
And then the grass is dropped or pushed into place as below.
Once dry, the excess is brushed/blown off and some tufts like these can be added if you want. I chose to add a few of them. Here's the final result.
Thanks for reading! As mentioned above, the next and final post in this series will be on lists, tactics, army expansion and so on. It will include some better photos of the various units and characters and ideas about them! Stay tuned for some tactical wisdom of dubious merit! :)
See past posts on the Dwarf project here:


