Saturday 30 October 2021

Halpi's Rift - Empyrean Plane

Third game in Halpi's Rift Campaign - the Empyrean Plane. This is the "good" plane with forests that heal units in them, and chapels that inspire your nearby units (so allowing them to reroll break tests if they don't already have inspire). Plus the channeling table helps and heals your units. The magic is a bit weird in this one as your spellcasters heal if they are in the opponents half of the board, but they take damage equal to the turn number, and increase their spells by a level if on your side of the board.

I continued using my Trident Realms and Vaughan his Abyssals, though with changes to lists. My Trident Realms brought along some Orc allies, given I'd just painted them and was keen to use them!  The Abyssals took a Warlock and more magic than last time.


Trident Realm and Orcs

  • 2 Depth Horror Hordes
  • Riverguard Dambuster Horde
  • 2 Kraken
  • Depth Horror Eternal
  • Riverguard Sentinel
  • Kyroqsh the Hunter
  • 2 Orc Gore Rider Regiments 
  • Orc Godspeaker
  • Orc Flagger

Abyssals 
  • 2 Succubi Regiments
  • Abyssal Guard Regiment
  • 2 Flamebearer Troops
  • 2 Hellhound Troops
  • 2 Gargoyle Troops
  • Moloch Horde
  • Efreet
  • Warlock
  • Abyssal Archfiend
  • Succubi

The Game

Scenario was control, so the table divided into six 2 foot square sectors, and whoever controls the most at end of the game wins. The central sector of the opponents deployment zone is worth two points to you if you hold it, and other sectors are worth one point each.

With a smaller more punchy army I vacillate over deployment, but eventually put my Depth Horrors behind the Orc Gore Riders to help protect them from shooting, and to be a second wave to hopefully smash through the centre and capture this more valuable sector.


I win first turn and advance to charge range.

My big formation of death in the centre!

The Abyssals charge and position themselves to flanking or support positions.

Hellhounds do five damage in melee to my left Gore Riders, and fireballs and firebolts do six to my other Gore Riders. Luckily I have a Flagger here to help boost morale though!

My turn, and I kill the Hellhounds with the first Gorerider Regiment, and the second Gore Rider Regiment charges and damage the Molochs. My Depth Horrors charge through the forest and kill a Flamebearer troop. On the right, my Sentinel charges and destroys a flanking  Gargoyle Troop.

Magic rockets back and forth. My Orc Godspeaker fireballs and wavers the Efreet, but then the Warlock blasts and kills him in turn.  

On the left my Kraken and Kyroqsh have got themselves into an unfortunate position and are surrounded, and the first Kraken is killed.

The Abyssal Guard in the centre waver my Gore Riders and my Depth Horrors behind have to spend a turn sidestepping to their left to get into position to charge. 

Molochs kill my other Goreriders, but are then finished off by my Depth Horrors, who have managed to survive a flank charge from the Hellhounds.

My other Kraken and Kyroqsh manage to kill the archfiend but then go down fighting attacked both flanks.

In the centre, the Warlock has blasted away a Depth Horror unit, and then been killed by my Dambusters, which join the other Depth Horror unit in attacking the Abyssal Guard. But a double one for the break test and the Guard stand firm and regenerate about a dozen wounds in their turn 5!

And turn six, and the game ends. I finish off the Abyssal Guard, but it is not enough. The Abyssals have captured both left sectors, and the bottom right in photo below. I have the bottom central sector and top right, and the central top sector is contested. Score is 3-2 to Abyssals!

Saturday 25 September 2021

Halpi's Rift - Abyssal Plane

Vaughan and I played our second Halpi's Rift game today, with his Abyssals taking on my Riverguard on the Abyssal Plane. See this previous post for the first battle in the Material Plane.


I don't really have any super demonic evil looking Abyssal terrain, so making do I flipped over the mat and added cotton wool some steam to the lakes, and evil tree in the middle of the forests, and some old magical vortices to represent the magical obelisks. :) 

The Hellfire lakes give -1 to Waver and rout values of any unit touching them.
The Magical Vortices are blocking terrain, and any unit within 6" gets the Brutal +1 for each vortex within that range. (I.e. +1 to nerve checks when trying to rout enemy units).

The Channeling Table results for the Abyssal Plane tend towards destructive effects!


Armies used were similar to last time but changed up a bit.   My list was:

  • 2 Riverguard Treeleaper Regiments
  • Riverguard Dambuster Horde with Brew of Sharpness
  • 2 Kraken (Froghemoth)
  • Water Elemental Horde
  • Greater Water Elemental
  • Riverguard Sentinel with Tome of Darkness
  • Riverguard Dambuster Sentinel with Blade of Slashing
  • Ecktar

Vaughans list was:

  • Abyssal Guard Regiment
  • 2 Succubi Regiments
  • 2 Moloch Hordes
  • Gargoyle Troop
  • 2 Hellhound Troops
  • Abyssal Harbringer
  • Seductresss with Bane Chant
  • Chroneas
  • Archfiend of the Abyss

The Game

Here's the terrain. I used Epic Dwarf Map generator, but replaced buildings and hills with magical vortices, and difficult ground for the hellfire lakes. Mission is Loot, with the three treasure chests to pick up and hold across the centre line.


First turn, Abyssals win and move first with me following. My units are mostly faster, so I move up to within strike range of the Abyssals in centre and on right, but out of their charge range except for the Archfiend which will be able to charge if it wants.


Turn 2 and the Abyssals charge the Archfiend into the Dambusters and move up with the Succubi to support.

The Fiend gets luckyish and wavers the Dambusters which is rather disastrous for me! 

My turn and on the channeling table I get the "Abyssal Vengeance" magical effect, which means I chooose a unit to explodes when it dies, doing D6 Piercing 2 hits to any unit in combat against it. Naturally I choose the Dambusters and put a big explodey marker next to them to remind the Abyssals what will happen if they mess with them...

In the centre the Abyssals had thrown their Gargoyles forward to block my Krakens and Greater Water Elemental.  The Gargoyles also had a Cloak of Death Channeling Table result on them which did a point of damage to four of my units, though two of them healed this with regeneration. Not seeing any better option I charge the Gargoyles down and overrrun, and get ready to face the return charges from the  Abyssals. On my left the Treeleapers kill a Hound unit.

I charge into the Succubi on my right flank but fail to do much to them.

Turn three for the Abyssals and they care not about the exploding Dambusters and the Archfiend and Succubi finish them off taking three and two damage respectively from them. Treeleapers are finished off on my other flank too. Both my flanks have caved in, and I also lose a Kraken in the centre to Molochs thanks to the Magical Vortices either side of them... My Riverguard Sentinel who had jumped over Chroneas to hunt down the Abyssal Harbringer, is unfortunately wavered by firebolts shot by the Harbringer. Things are going... poorly...

My turn three and I kill off the Abyssal Guard which had tried a cunning flanking move on the Water Elemental, and I also manage to finish off Chroneas with the Water Elementals thanks to a Channeling Table result of "Fiendish Frenzy" (grants Elite so reroll ones to hit).

Turn four and the Abssyals smash through my flank units...

Leaving me with just a Kraken, my Water Elementals and two characters.

I counterattack and do a lot of damage but not enough to break any Abyssal unit...

Turn 5 my centre units are killed off but Ektar charges and kills the Molochs, causing them to drop the central treasure chest. Individuals can't carry these loot tokens but it stops the Abyssals having it! Also on my right my Water Elementals have survived against the first Succubi regiment and kill them with help of a Channeling Table result of "Fiendish Fury" yet again!

Turn 6, and the Succubus tries to stop the Water Elementals but fails. They pass through him and finish off the wounded second Succubi unit, grabbbing the chest from them. In the centre the Archfiend kills the Riverguard Sentinel, and Ektar charges him back but fails to do anything.

And the game ends turn 6. We both have a single Treasure Chest each, so the game surprisingly ends in another draw (though it would be a win to the Abyssals on killpoints!).


Conclusion

All the extra Abyssal Plane effects means battles here will be bloody! It was looking very grim for the Riverguard until Turn 5 when I got a slim chance for achieving a draw. The Abyssals had a chance to multi-charge my Water Elementals with two Succubi Regiments but favoured doing it with just the one Banechanted unit, that came to within one point of destroying them, but ultimately let them live and regenerate and fight back, killing the two Succubi regiments and snatching a chest for the draw. The Archfiend killed the Sentinel who was aiming for the Hellhounds holding the left side treasure chest, but this also meant it failed to reclaim the central chest.

Another fun game and more learning for both of us and we will be onto the Empyrean Plane (Good) for the third battle!

Saturday 3 July 2021

Halpi's Rift - Material Plane

Vaughan and I played our first Halpi's Rift game today, with his Abyssals taking on my Riverguard on the Material Plane.

Halpi's Rift is a campaign supplement for Kings of War. You can play scenarios across a series of Magical Planes, where there are various magical effects in action, and extra magic abilities and mercenary units available.

These magical effects increase as you take more spellcaster levels, but here both Vaughan and I took minimal magic here so the effect was smaller. We used the Epic Dwarf Map, replacing the difficult terrain with freezing lagoons (you get frozen rule, -1 movement if you start your turn in them). The building on the right with the blue roof brought along by Vaughan is the Bard's Taphouse (can't be wavered if within 6" of it). And spellcasters within 12" of centre of table (marked by standing stone) can reroll their spell dice, but take a damage for each dice rerolled. Also start of each turn you roll dice equal to your spellcaster levels on a Chanelling table and you can get various random magical effects happening.

I used the Riverguard Trident Relams army I just used in the Oamaru tournament.

  • 2 Riverguard Treeleaper Regiments
  • 2 Riverguard Treeleaper Troops
  • Riverguard Dambuster Horde
  • 2 Tidal (Frog) Swarm Regiments
  • 2 Depth Horror Hordes
  • Kraken (Froghemoth)
  • Depth Horror Eternal
  • Riverguard Dambuster Sentinel
  • Ecktar

Vaughan's Army was:

  • Abyssal Guard Regiment with Dragonshard Shield
  • 2 Succubi Regiments
  • Hellhound Regiment
  • Flamebearer Troop
  • Molochs with Strider Boots and Imp
  • Gargoyle Troop
  • Efreet
  • Seductresss with Bane Chant
  • Harbringer
  • Chroneas
  • Archfiend of the Abyss

We determined scenario and it was invade (player with most unit strength in opponents half of table wins at end of the game). Here is deployment.


Here's the start of the game on my left flank. The Abyssal army has some shooting units (like the flamebearers and Efreet opposite this flank) and some units also regenerate. So in theory I want to close  into combat as quickly as I can, as my units will do poorly in a shooting or attrition grind.

On the right as I push forward, getting ready to take a charge from the Abyssal units, as their wings give them the advantage of first strike.

The Abyssals advance and charge...

I win on my left, wiping out the Abyssal units except for the annoying Efreet, losing a Riverguard Troop and Frog Tidal Swarm to Firebolts/Fireballs. On the right, I take out the Archfiend and Gargoyles, but lose all my units except the Dambusters.

The battle for the centre takes place on the freezing lagoon, with two Succubi units and a Seductress killing off a Riverguard Regiment and turning to face my oncoming Depth Horrors and Froghemoth/Kraken. Ecktar tries to hold up one of the Succubi units.

On the right my Dambusters have killed the Archfiend and get ready to take a charge. But Chroneas and the Molochs destroy them handily enough.

On the left the Efreet almost manages to kill my Depth Horrors with Fireball, but gets unlucky with dice and my Depth Horror Eternal hunts him down. Meanwhile the battle of the lagoon in the centre continues.

I lose Ektar and a Depth Horror Horde, but manage to take out the two Succubi regiments and Seductress as the game goes to turn 7. This means I end with the Depth Horror Horde and Depth Horror Eternal in the opponents half of the table (3+1 unit strengths respectively).

But the Abyssal Moloch Horde and Chroneas are in my half (3+1 unit strengths respectively), and so the first game of Halpi's rift is a draw!

Conclusion

A quick and bloody battle between these forces, with the game going to turn 7 allowing my Froghemoth time to destroy the last Succubi unit and secure the draw.  An interesting matchup with the Abyssals having a range of units that can cause mine much trouble, but also having to deal with all my Ensare and speed. Meanwhile my frog units also found themselves struggling agains the ensare of the Succubi, especially when they were also in the difficult terrain of the lagoon!

The special magical effects didn't have a huge impact on the game. They slowed the Succubi down so they were unable to move as far as they wished, and chanelling ended up inflicting a few points of damage. Especially one turn each the five extra attacks option, that benefited the Depth Horror Eternal in killing the Efreet, and the Archfiend in killing my Dambuster Sentinel. 

Next battle will be the Abyssal Plane... 

Monday 28 June 2021

The Oamaru Muster - Kings of War Tourni report

I've just got back from a fantastic weekend away down at the Oamaru Muster Kings of War Event. Oamaru is a small town in the South Island of New Zealand with some new Kings of War players there. So a few of us from Christchurch and Timaru travelled down to join them for a weekend. Here's a brief report!


We had eight players in two teams. The plan was that the Oamaru players would play the outsiders over a relaxed two rounds a day format, giving plenty of time for learning and socialising given many were new to the game. 

Team Oamaru
Gordon - Dwarves
Gavin - Ogres
Josh - Goblins with Orc Ally
Craig - Kingdoms of Men (Easterlings)

Team Outsiders
Mark (Me) - Trident Realm (Riverguard)
Martin - Dwarves
Ken - Kingdoms of Men with Elf Ally
Nigel - Kingdoms of Men with Abyssal Ally


I took my Trident Realm Riverguard Army to its first games, using the following list.
  • 2 Riverguard Treeleaper Regiments
  • 2 Riverguard Treeleaper Troops
  • Riverguard Dambuster Horde
  • 2 Tidal (Frog) Swarm Regiments
  • 2 Depth Horror Hordes
  • Kraken (Froghemoth)
  • Depth Horror Eternal
  • Riverguard Dambuster Sentinel
  • Ecktar

I took zero magic items figuring I'd be confused enough already with all the new frog units trying to remember their rules! :)


Game 1 Kill - Ogres

First game I was up against Gavin's Ogres. Gavin is a new player to Kings of War, but has already managed to get a solid number of Ogres painted up. This was my first game with my new Trident Realm army but definitely not my first at Kings of War!

Some of the Oges, an Ogre Legion and Blaster.

Beserkers and Shieldbreakers, with Boomers in the back.

My frogs hop into the Ogre line taking advantage of the difficult terrain in the centre. The Ogre Shieldbreakers soak the first hit from the combined Depth Horror charge, but are wavered and destroyed shortly thereafter. I throw in units to overwhelm the centre and right, while a frog swarm and Windblast from Ektar delays the mighty Ogre Legion on my left for a couple of turns. 

The Berserkers take down one of my Depth Horror hordes and some Riverguard, but the Ogre centre and right fall.

And then Ogre Legion is attacked from all sides and the remaining Ogres are overwhelmed. Two Ogre heroes roll double one's and fail to kill a frog swarm...  An inglorius end, but at least they got a few points on the board, as I take a first win with the Riverguard. 

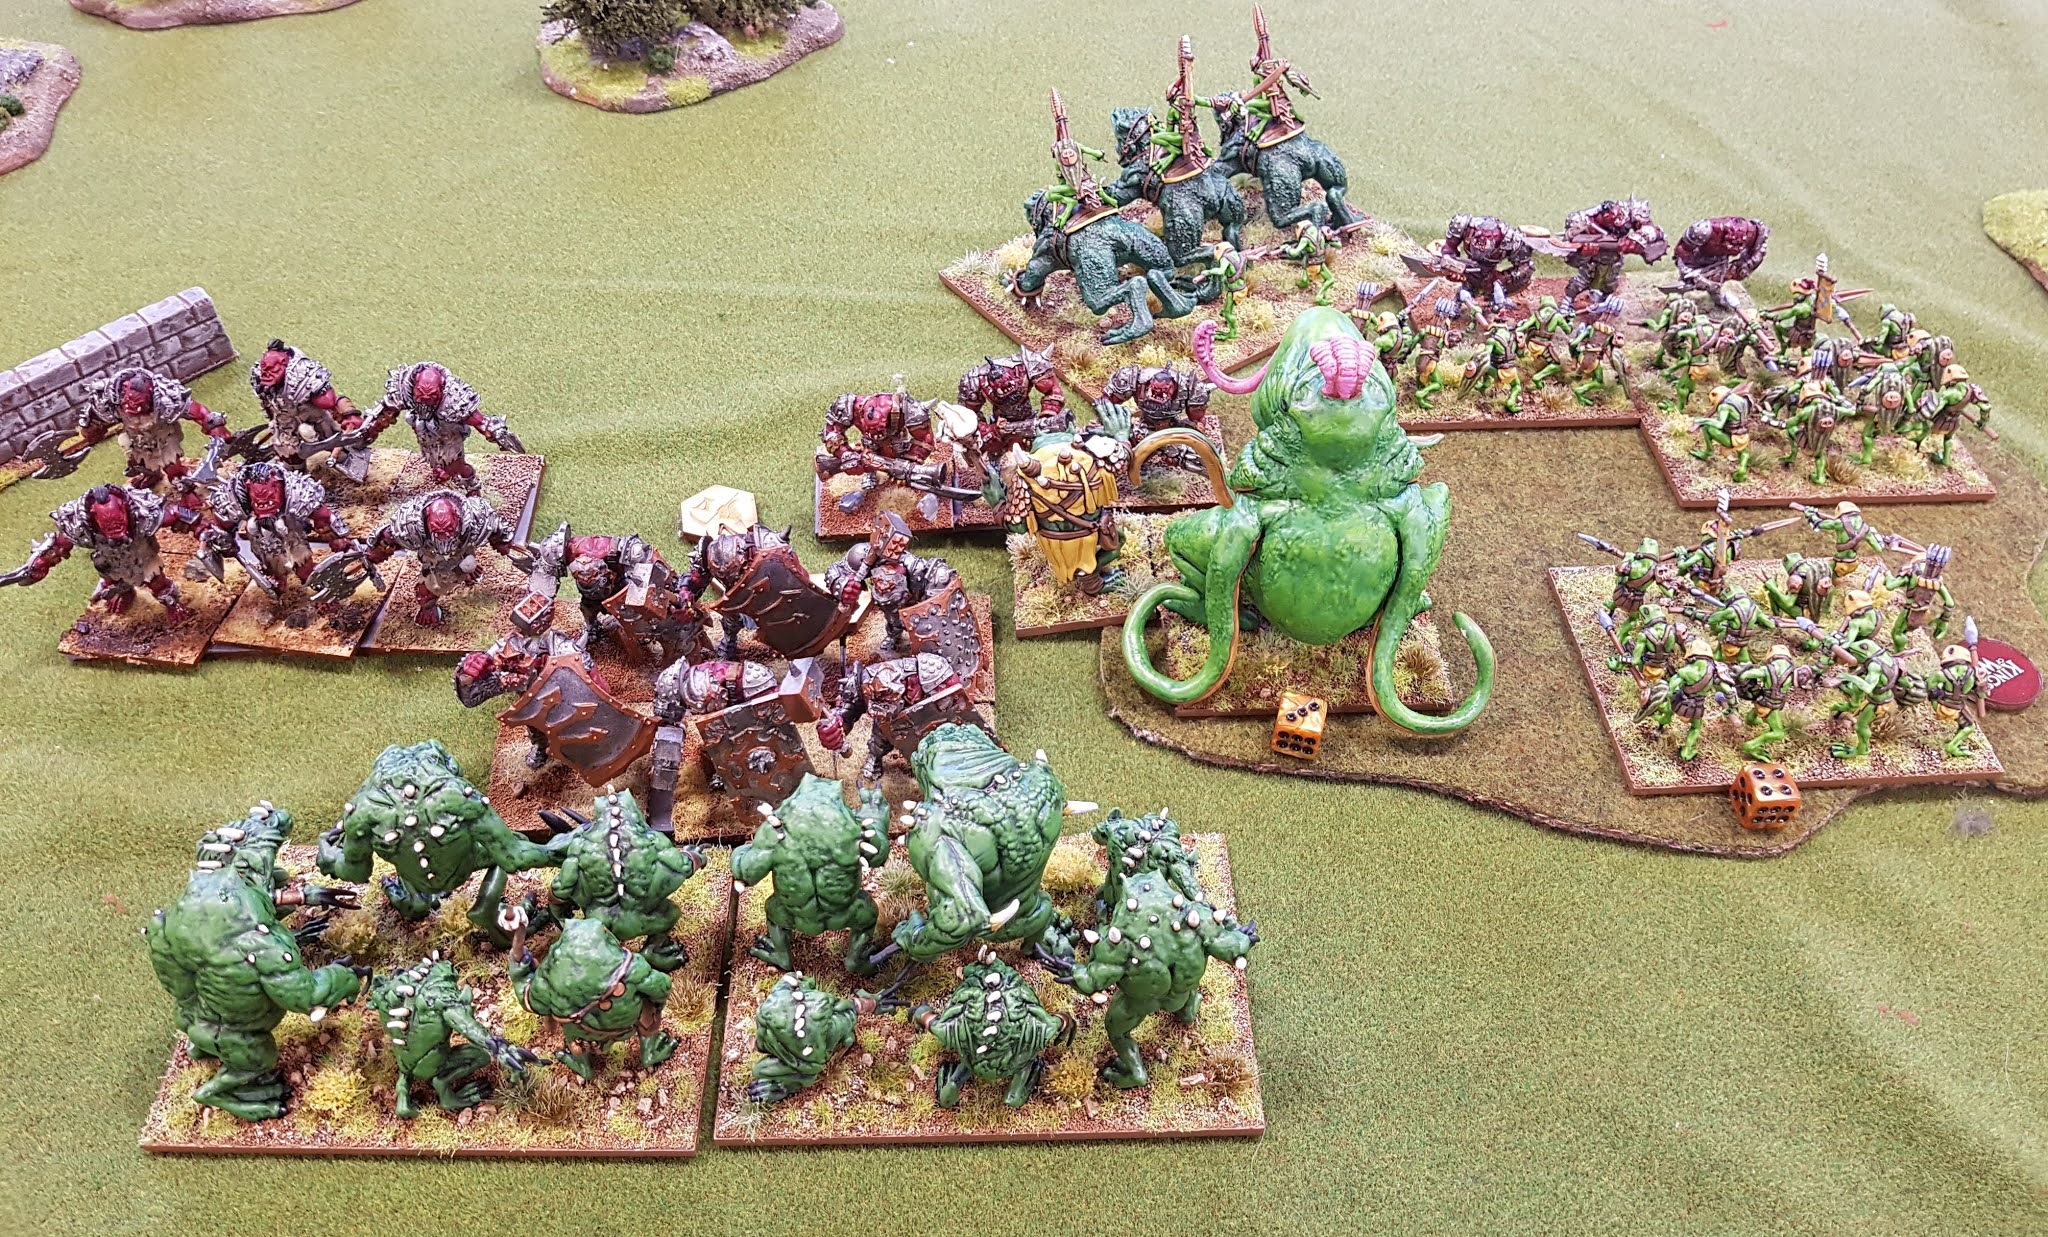
Game 2 Dominate - Goblins

Next up was Josh's Goblins. He has bought a mighty horde of the new Mantic Goblins to paint ( I think he has about two mega armies or something!). But here most of his strength was provided by three Giants and two Orc Morax regiments, added to ensure he would have enough painted units ready for the tournament!

I thump into the middle of the enemy army again, taking out some Mawbeast chaff units.


My Riverguard are keen to get stuck into the goblins - which are clearly the wrong sort of greenskins!

The Froghemoth (Kraken) dies in a round to the Orc Morax.

But my forces push through, taking out the Orc and Goblins units, but struggling against the Goblin Giants...

One goes down and my units turn around to fight the last remaining giants and goblins. 

One of the goblin units has Crystal Pendant of Retribution which severely injures my Depth Horror Eternal and two Riverguard units as they kill the goblins. The Giants finish off another couple of my weakened units. However my forces hold the centre of the table and win the scenario and game.

After the fact, we also realised some errors here, Giants have Strider (of course), and so don't get -1 for hitting things in difficult terrrain. Also, I think I remember doing three hops over units with Treeleapers which had taken damage the round before, which they shouldn't have done - sorry Josh! But all useful rules learnings for the future.

Game 3 Push - Kingdoms of Men

Next was Craig's Easterling themed Kingdom's of Men.  We both have our loot tokens in the centre of our lines, so it would be a big punch up in the centre.

Turn two situation...

The human shield wall had a cute fireball magic item they were keen to use. Unfortunately they had to get within hopping distance to use it - squish!

The Human charges come in rather piecemeal...

...and I'm able to deal with most of them effectively, though I struggle to break this Knight unit.

The Humans fight back and take out my Dambusters and Depth Horrors, though the Kraken regenerates heavy damage and survives.

The Men win the battle on their right flank, but I hold the left and centre and all the loot tokens so it is another win to the Riverguard.


Game 4 Raze - Dwarfs

Last game up against Gordon's Dwarves. I knew this would be tough because the Dwarves have many heavily armoured units and a lot of shooting, both things my army struggles to deal with. On the other hand the scenario isn't a bad one for my army due to my speed.

The Dwarf centre with Behemoths and Ranger Troops.

And Lord on Great Beast, Mastiffs and Ironguard on my right.

I lose a Depth Horror Horde to the first round of shooting as expected, but my Treeleapers jump in and smash up the Dwarf Rangers.

My frog swarm even wounds a Steel Behemoth cancelling its shooting for a round.

Over on the right, I roll two double one's, failing to rout the Dwarf Mastiffs and Ironguard, and suffering much damage to my Dambusters in return.

The Dwarven Shieldbreakers and Steel Behemoths are tough for my army to deal with, and I'm desperately trying to stop them getting to the central objective (the egg).

I almost manage it, but in the end the game is a draw, with the Dwarf Shieldbreaker infantry smashing their way forward. I made a tonne of mistakes in this game, but also learned a lot from it.

Gordon added up the points at the end of the tournment, and the Outsiders team won the plate, while I got the prize for best general and most kill points. A very successful outing for the frogs! I will post a fuller list of results once I get them from Gordon.


Most importantly though, we all got to spend a great weekend hanging out and wargaming. The Oamaru guys and Gordon in particular did an amazing job in organising the event with player packs, tasty food provided, and great company. We played in the local school hall where Gavin is a teacher.  I note I haven't played Ken and Nigel from Timaru yet either, and hope to do so one day soon!


We also travelled down to Scott's Brewery in the Victorian district in Omaru for some drinks and food on the Saturday night.


Worth a visit in its own right, as Oamaru has changed over the years and these days its Victorian era Steampunk theme and festival is a big part of the attraction, in addition to the architecture.


Here's a few more pics of games from the tournament. Dwarves vs Goblins.


Men vs Men and Elves


Men and Abyssals vs Ogres


Dwarves vs Dwarves!

And Grokamok, who as well as failing to kill my Frog Swarm in game one, rolled another double one and failed to kill this cannon as I walked by the table...

I'll finish with some photos of Nigel's awesome Oriental themed Kingdoms of Men with Abyssal Ally, which got best painted award.

The Abyssal Ally - Succubi and Seductress

Nigel's army theme is based around the idea of a ruling Matriarchy that maintains power via an alliance with the Abyssals - hence the Succubi ally contingent...


Magnificent Temple Lion Cavalry

Rifles and a Hero


Conclusion

A wonderful event with a great crew and hope to attend again next year!  It clashed with Cavcon in Christchurch unfortunately, which was my fault as I got confused with dates until it was too late, juggling work projects, the wife's birthday and other things in my head!

We're planning on a Christchurch Kings of War event later this year, likely October/Novemberish at one of the regular CWC tournaments, which I will organise with the CWC committee. It will be a tough act to follow given how well organised this one was by the Oamaru guys! I will post more details once we have firmed up dates, including in the Christchurch Rank and Flank and New Zealand Kings of War Facebook Groups.