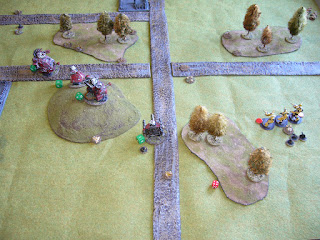
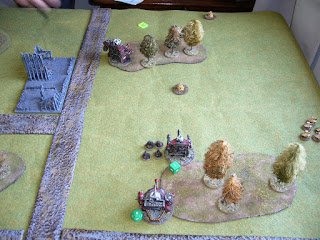
Another game using big rigs - massed Gargants this time! Playing against Andrew's Tau. I played around with several lists, and in the end went with just five huge gargants. Having only five activations at 4000 points seems kind of crazy, but what activations they are!
I also wanted to test out some "reinforced boiler" special rules that are being discussed at present on Tac-coms. Reinforced boilers are an upgrade that gives gargants an extra 5cm move at present. This is something likely necessary to make the army playable given it is so slow (e.g. other titan armies have faster titans available), and something that is also characterful in an "Orkimedes" list. However there is a thought that there should be some risk to the gargants in "overcharging" the boilers. I went with a variant where every move segment you use it you must roll a D6 and take a point of damage on a roll of 1 (damage which in turn risks being a critical hit and starting a fire). I stuck reinforced boiler on four of the gargants to give it a good test.
Gargant Bigmob (3.2.1 - Developmental)
==================================================
MEGA GARGANT [1050]
Mekboy Big Boss
GREAT GARGANT [850]
2 Soopagun, (Kustom) Reinforced Boiler, Lifta Droppa
GREAT GARGANT [775]
2 Gatling Kannon, (Kustom) Reinforced Boiler, Mega Lobba
GARGANT [675]
2 Soopagun, (Kustom) Reinforced Boiler, Deth Kannon
GARGANT [650]
2 Soopagun, (Kustom) Reinforced Boiler, Soopa Zzap Gun
Here's my powerfield numbers. Minimal for the big three (6+D6 rolls), and average for the little guys (3+D3 rolls).
Vior'la Tau
425 Vior'la FW Cadre, 6 Fire Warriors + Shas'o, 3 Devilfish, Skyray
200 Pathfinder Group, 4 Pathfinders, 2 Devilfish
275 Stealth Group, 6 Stealth Suits + Cadre Fireblade, 2 Gun Drones
400 3 Riptide Suits + Shas'el, 3 Missile Drones
150 Recon Group, 3 Tetras, 2 Piranhas
150 Recon Group, 3 Tetras, 2 Piranhas
200 Protector Class Cruiser
625 Manta
325 Vior'la FW Cadre, 8 Fire Warriors + Ethereal + Cadre Fireblade, 2 Gun Drones
300 Crisis Cadre, 4 Crisis Suits + Shas'el + Cadre Fireblade, 2 Gun Drones
275 Stealth Group, 6 Stealth Suits + Cadre Fireblade, 2 Gun Drones
225 Pathfinder Group, 6 Pathfinders, 2 Gun Drones
150 Orca Assault Dropship
150 Orca Assault Dropship
150 2 Barracudas
Turn 1
Here's the setup, Andrew chose corner deployment, and top left. He is strung out with a line of garrisons across the diagonal. His Manta is planetfalling. My five gargants cluster together near the half way point. Ork objectives are one behind the Gargants and two just near the camera. Tau objectives are in the top left corner.
View from behind.
I win Strategy Roll, and the Mega doubles forward, plastering a Pathfinder formation and another Tau infantry formation with inaccurate fire. One enemy unit is killed, and blast markers placed. Ork shooting sucks when moving...
Other advances with fairly ineffective exchanges of fire occur, including with the Riptides, and the Gargants have advanced to an echeloned line. Orcas and other fire strips shields from the Mega-Gargant. At this point the Orks are out of activations and the Planetfalling Manta arrives... The Tau Spacecraft strips off the remaining Mega Gargant shields and manages to do a point of damage to it also.
The Manta was aiming for the location between the two Ork Take and Hold objectives, but deviated 11 cm towards the Mega-Gargant.
Over on Ork right, the Riptides supported by Recon units skirmish with the end of the Ork line.
Turn 2
The Orks win the Strategy Roll, and for the first time in a decade the Mega-Gargant gets to unload its full sustained firepower at a perfect target. Grot missiles, Mega-cannons, Lifta-droppas, all blast the hell out of the Manta and the two unloaded formations.
Get ready...
Boom.
Manta destroyed and the two broken formations of Tau retreat to the ruins behind them.
I retain initiative and the Gargant on the hill blasts the Riptides with sustained fire, but doing little damage in this instance.
The Riptides and Recon units move in behind the ork lines, catching the Mega-Gargant in another crossfire, and causing two more damage. The Orks ignore them and press on, Great Gargants smash forward and wipe out two infantry formations in firefights.
The Tau unload more infantry from an Orca on the Ork right, not causing any further damage though.
A normal Gargant charges the newly arrived Tau Stealth Suits, killing three of them, but losing the combat and breaking away towards the Tau side of the table.
More pressure on the Mega-Gargant, with damage and blast markers piling up...
Finally it's had enough and it breaks forwards to put some ruins between it and the Riptides.
End of turn positions, before rallies.
And further over on the right.
Ork Mega Gargant rallies using the reroll, but not the normal Gargant. Broken Tau formations fail to rally.
Turn 3
Tau win strategy roll and attack the Mega Gargant again. The Mega Gargant is unperturbed, and turns around heading back towards it's blitz objective, blasting and breaking the Riptides.
A little Gargant also comes back to hold the blitz objective, and blasts a nearby Tau Recon formation, just placing blast markers.
Orcas and everything the Tau have throws fire at the Mega Gargant trying to kill it, but to no avail.
The Ork Gargants continue their stampede, wiping out another two Tau infantry formations in firefights.
Mega Gargant has taken 13 of 16 damage but is holding on...
The path to the cluster of Tau objectives is open.
End of turn positions. Ork Gargants rally. Orks have one victory condition (Break their Spirit for destroying Manta), Tau have no victory conditions.
Turn 4
Orks win Strategy Roll again, and the Great Gargant engages the Tau formation near their blitz, breaking but not destroying them.
The Mega Gargant retains, doubles and contests the ork blitz, shooting and destroying another Tau formation. The other Gargant here moves and takes a long range shot with its Deth Kannon at an Orca which has landed to contest the Tau objectives. It fails to hit.
Ork Gargants are contesting all three Tau objectives here, but the Orca is stopping them from capturing them this turn.
End of turn 4 and Orks have one objective (Break their Spirit), and Tau none. The game fails to go another turn so is decided on victory points. Tau gain some points for the Mega Gargant because it is under half damage remaining, but Tau losses are catastrophic, and the Orks haven't lost anything else. Win to the orks on Victory Points. Here's the Tau losses, which we didn't bother adding up.
Conclusion
A victory at last! The plan for the orks worked here. With only 5 activations I never imagined I'd be able to win by taking objectives. Especially with Tau Orca's able to sweep in and contest things at the last moment. The goal was always to win on Victory Points by lasting to Turn 4, threatening the Tau objectives, and damaging the Tau more than they damaged me. This was achieved. The Tau came close to destroying the Mega Gargant, but couldn't quite pull it off. Me winning the Strategy Roll on Turn 2 was devastating. the Tau strategy was also pretty much dictated to them by the location of their drop point for the Manta, decided before they saw my deployment. Coming on so close to the Mega Gargant they had little choice but to attack it with everything they had and it also nearly payed off!
Reinforced boilers were useful in a few instances here in making it to engages or objectives, but generally I was pretty cautious about using them with the damage risk rule. Somehow I managed to avoid taking damage from them all game when I did use them. Likely some more flak on one of the Gargants would have been more useful in this set-up, but the flexibility provided by the boilers is pretty necessary for at least a few units in the army I think, as otherwise maneuverability will be fatally slow and predictable.


Well done! Good to see that, at least sometimes, the big boys can play!
ReplyDeleteHappy to see a victory at last, I prefer playing with 3rd edition tough, all those activations and victory conditions seem hell complicated and annoying to me!
ReplyDeleteThanks guys, yes Epic40k is good too!
ReplyDelete