Sunday, 5 January 2014

Epic 3K: Orks vs Marines

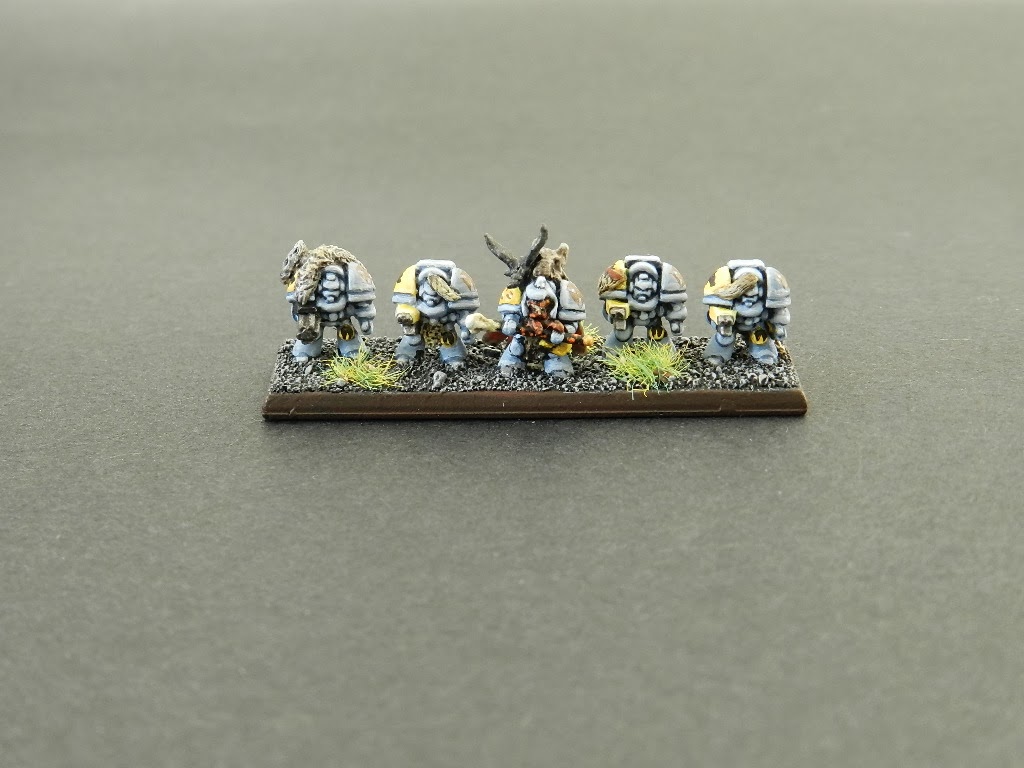
Another game of Epic vs Nick's marines today. Nick hasn't played much Epic Armageddon but has done a nice paintjob on his marines so time to get them on the field of battle. He borrowed a couple of Warhounds from me and I helped him out with a few tips on using Marines throughout the game - as they are not the easiest army for a beginner to get the hang of!

My Ork army list once again made using Army Forge:

3000 POINTS
Ghazgkhull Thraka's War Horde (NetEA Tournament Pack 2013)
==================================================

KULT OF SPEED [200]
8 Warbuggy

WARBAND (BIG) [350]
4 Nobz, 12 Boyz, 4 Grotz

WARBAND (BIG) [350]
4 Nobz, 12 Boyz, 4 Grotz

GARGANT [650]

BLITZ BRIGADE (BIG) [250]
8 Deth Kopta

BLITZ BRIGADE (BIG) [350]
8 Gunwagon, 2 Oddboy (Zzap)

STORMBOYZ WARHORDE [150]
6 Stormboyz

KULT OF SPEED [200]
8 Warbike

MEKBOY STOMPAMOB (BIG) [500]
6 Stompa, 4 Killa Kan


Nick's Marine army list was as follows. Except that we forgot that the Warhounds were supposed to be singles and they were instead run as a pair, and we also forgot that the Assault Marines had a Chaplain (despite Nick having modelled one!).

3000 POINTS
Codex Astartes (NetEA Tournament Pack 2013)
==================================================

TACTICAL [375]
6 Tacticals, Supreme Commander, Rhinos

TACTICAL [375]
6 Tacticals, 2 Dreadnought (1 close combat, 1 shooting)

TERMINATOR [400]
4 Terminators, Chaplain

LAND RAIDER [325]
4 Land Raiders

PREDATOR [250]
4 Annihilator

ASSAULT [225]
4 Assault Units, Chaplain

WHIRLWIND [300]
4 Whirlwinds

BIKE [200]
5 Bike Unit

WARHOUND [275]
1 Warhound Class Titan

WARHOUND [275]
1 Warhound Class Titan


Turn 1

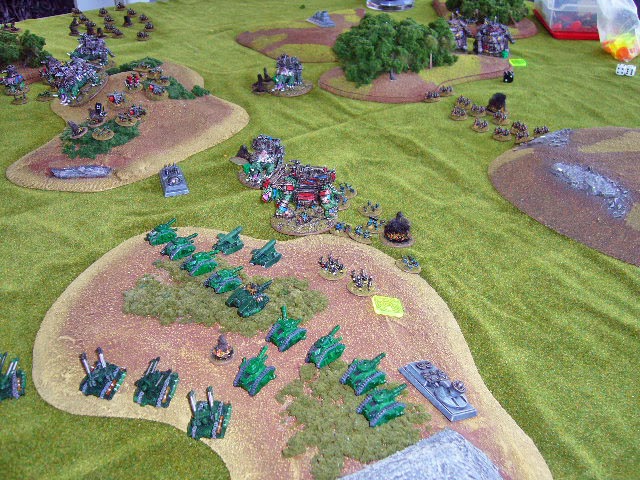
The photo below shows the lineup of the armies.  The Marines have garrisoned their Tacticals with Dreadnoughts formation in the central ruins, and I have done the same with my two Ork Warbands. In hindsight I wish I had also garrisoned the Stompas in there...

Nick wins strategy roll, but hands it to me. I storm forward with the Gargant and blast the Marine garrison, but only place only a blastmarker. Their overwatch also places a blastmarker on my Gargant.

On my right I advance my Dethkopters behind a central hill. Nick doubles up with his Landraiders, killing two, and then engaging in a firefight with his Bikes with support from the Landraiders. The Dethkopters are wiped out for the loss of two Marine Bikes.

Both sides move to contest the ruins in the centre of the table. I'm trying to soften up the marines with some shooting so my warbands can assault them, but it's not working very well. The Warhounds and Predators scoot forward and blast the Gargant removing all its powerfields and doing a point of damage. My buggies race down the left flank into a position to threaten the Whirlwinds in the next turn.

On the other side of the table, my Gunwagons double forward and shoot the Landraiders, the Zzap guns miss, Nick saves the one other hit, and thus the Landraiders only take a blastmarker.

Turn 2

Nick teleports the Terminators in, wins the Strategy Roll, and assaults the Gunwagons. The Gunwagons are wiped out for the loss of one Terminator. The Predators then sustain fire at the Gargant, doing a point of damage.

The Stompas retaliate with a sustain fire action, and kill three Landraiders. I also sustain fire with the Gargant on the Warhounds, but fail to do any damage. Not a great move on my part really as I was out of range with its head Death Ray.

The Marine Whirlwinds fire and kill 4 of the nearby Ork Buggies, breaking the formation. The Marine Supreme Commander's Tactical formation and Assault formation then do a combined assault, firefighting and driving the first Ork Warband from the ruins with heavy losses and losing none in return. My Warbikes are unimpressed... 

...and race up the hill and wipe out the Marine Bikes, losing two of their number in the close assault.

The Marine Warhounds blast the Gargant, which has now taken 3 points of damage and plenty of blastmarkers. It breaks and retreats back towards the Ork Blitz objective. My Stormboyz feeling the contest in the ruins is going badly, race through a gap in the marine lines towards the Marine Blitz and Whirlwinds, hoping for a lucky Strategy Roll next turn. The Gargant rallies, as do the Buggies and the lone Landraider.

Turn 3

And... no lucky Strategy Roll for the Orks.

The Whirlwinds see off the Stormboyz just as they did with the buggies.

I try to sustain fire on the Terminators with the Stompas, failing the activation roll but killing one anyway with normal fire. The Terminators assault the Stompaz, killing 3 Killa Kans but being wiped out in the process before support fire from the nearby Tacticals can occur.

Undaunted the Assault Marines then launch themselves into the fray!. They are also wiped out in a two round close assault (if only they had their Chaplain - sorry Nick!) but they kill two Stompas. Chaplain or no Chaplain, the Stompas have had enough of all these ankle stabbers and waddle broken back towards the Ork Blitz to recuperate.  

My buggies scoot and shoot the Landraider and break it, and contest the Marine Blitz. The Marine Warhounds advance and blast the last Orks out of the ruins.

The Marines have the central ruins and send a Tactical formation back to shoot and break the buggies. The Ork Warbikes race towards the Whirlwinds, having learned nothing from the fate of the Buggies and Stormboyz and hoping to get lucky with the Strategy Roll ...

Turn 4

Orks win the Strategy Roll! The Warbikes kill two of the despicable Whirlwinds, sending the other two fleeing.

Marine Tacticals double back shooting the Warbikes, only placing a blastmarker but also contesting their Blitz objective.

More exchanges of fire occur and the Orks continue to fall back. The Gargant is on fire with 2 hitpoints left. The three strong remnant of a Warband doubles into the centre of the marine line to contest one of the Take and Hold objectives.

End of Turn 4 and neither side has achieved any victory conditions. I fail almost all my rally checks, and the Marines fail to rally their Whirlwinds. The game doesn't go another turn and so we count up victory points. The Marines have just over 2000 and the Orks just over 1000. 


Well that didn't go very well! I should have garrisoned the Stompas in near the ruins at the start I think, and used my Gargant to support some assaults to hold the area.  Instead I got caught in a shooting match - not what Orks excel at! At least the Ork Warbikes did well sticking to close assaults! Anyway well done Nick!

Update: And Nick has also updated his blog with a report from the Marine perspective, including some lovely close up photography.

Friday, 3 January 2014

Epicomp 2013 Galleries are up!

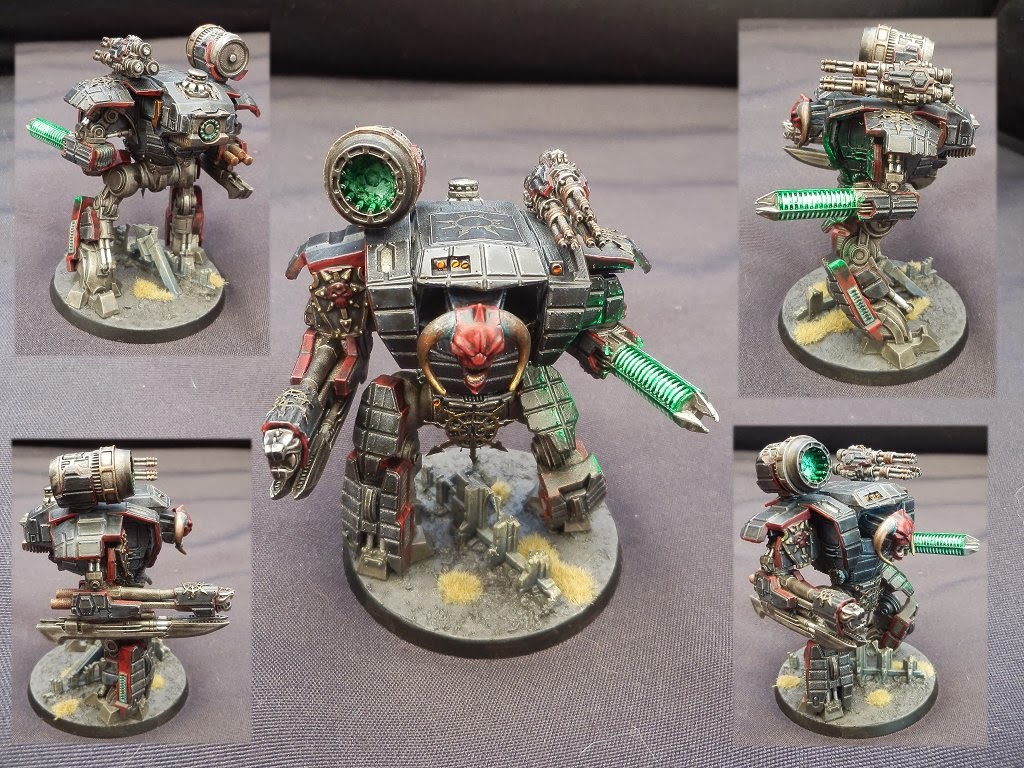
Just a heads up that the annual "Epicomp" painting competition for 6mm sci-fi is now displaying the galleries and voting for the 2013 year. Check it out at Tactical Command.

Here's a few teasers from the entries:


Wednesday, 1 January 2014

Epic 5K: Feral Orks vs Steel Legion

I played a 5K game vs Mikes Steel Legion yesterday. Unfortunately I forgot to switch the camera to a larger resolution so pictures are not the best, but I'll put them up anyway!

My Feral Ork list (made using the army creator at Armyforge) was:

Waaagh Thundastomp, 5000 POINTS
Snagga-Snagga's Feral Orks (NetEA Army Compendium v20120208)
==================================================

WARBAND [475]
2 Nobz, 8 Boyz, Orkeosaurus, Wyrdboy, Warlord, 4 Grotz

WILDBOYZ [350]
2 Nobz, 3 Two Wildboyz Units, Orkeosaurus, Wyrdboy

WILDBOYZ [350]
2 Nobz, 3 Two Wildboyz Units, Orkeosaurus, Wyrdboy

JUNKA BRIGADE [275]
Junka Trukks, 6 Boyz, Nobz, Wyrdboy

JUNKA BRIGADE [275]
Junka Trukks, 6 Boyz, Nobz, Wyrdboy

STEAM GARGANT [500]
3 Steam Gargant

WARBAND [300]
2 Nobz, 6 Boyz, 2 Grotz, 2 Squiggoth

WARBAND [325]
2 Nobz, 6 Boyz, 2 Grotz, 3 Squig Katapult, Wyrdboy

WARBAND [325]
2 Nobz, 6 Boyz, 2 Grotz, 3 Squig Katapult, Wyrdboy

WILDBOYZ [350]
2 Nobz, 3 Two Wildboyz Units, Orkeosaurus, Wyrdboy

WILDBOYZ [350]
2 Nobz, 3 Two Wildboyz Units, Orkeosaurus, Wyrdboy

MADBOYZ HORDE [190]
12 Madboyz

BOARBOYZ HORDE ('UGE) [250]
15 Boarboyz

BOARBOYZ HORDE ('UGE) [250]
15 Boarboyz

BOARBOYZ HORDE ('UGE) [250]
15 Boarboyz

TRAPPAS [185]
6 Wildboyz, Nobz


Mike's Steel Legion (Imperial Guard) list was:


Steel Legion, 5000 POINTS
Steel Legion (NetEA Army Compendium v20120208)
==================================================

REGIMENTAL HQ [750]
Supreme Commander, 12 Infantry, 7 Chimera, Fire Support Platoon (4 Fire Support), 2 Ogryns, 4 Chimera

INFANTRY COMPANY [500]
Commander, 12 Infantry, Fire Support Platoon (4 Fire Support), 2 Ogryns, 4 Chimera

TANK COMPANY [650]
10 Leman Russ

TANK COMPANY [650]
10 Leman Russ

SUPER-HEAVY TANK COMPANY [500]
3 Shadowsword

ARTILLERY BATTERY [250]  

3 Basilisks

ARTILLERY BATTERY [250]

3 Basilisks

ARTILLERY BATTERY [250]  

3 Bombards

ARTILLERY BATTERY [250]  

3 Bombards

DEATHSTRIKE MISSILE BATTERY [200]
2 Deathstrike Missile Launchers

FLAK BATTERY [150]
3 Hydra

FLAK BATTERY [150]
3 Hydra

THUNDERBOLT FIGHTERS [150]
2 Thunderbolts

THUNDERBOLT FIGHTERS [150]
2 Thunderbolts

THUNDERBOLT FIGHTERS [150]
2 Thunderbolts


Turn 1

Here's the setup, Mike is deployed along his baseline on the left. I am on the right, except that near the halfway line I have my Trappers garrisoned towards the bottom centre in a strung out line, and my two Squig Catapult Warbands are garrisoned in the forest top centre.
 

I advance on the left behind the cover of the forest, taking casualties from artillery...

and then air attack.

In the centre my Warlords Warband has debussed from their Orkeosaurus into some ruins. The reason for this is that Mike has his Deathstrike Missile Battery, that would do an average of about 7 damage ignoring armour to the Orkeosaurus, killing it and everyone riding it (including the Warlord).

Mike shells the infantry in the ruins with another artillery battery, and my Warlord gets unlucky and dies anyway(!), along with some of his band. No more rerolls for the Orks all game and we've barely started!

The Deathstrikes then target the steam Gargants, but I get lucky and they only do 3 damage to one of them. Then a Leman Russ company crests the centre ridge and blows another Steam Gargant to pieces, breaking the other two Gargants who retreat behind cover. 

Bombards shell my first Squig Catapult Warband garrisoned in the woods and they take 7 casualties, breaking and heading back out of range. Bombards have shorter range than other imperial artillery, but the "ignore cover" ability makes a real mess of orks!

Here's a closer look at the Orks advancing on my right. One of the Orkeosaurus trips up moving through the woods, gets angry and stampedes over the routing Squig Catapult warband who are really wishing they'd stayed home today. Another two of them are lost. 

I continue my advance into the hail of fire, with the Squiggoths making it up the table to within strike range of a still loaded mechanised infantry company. Here's an overview towards the end of the first turn.

Turn 2

I win the strategy roll. My intact Squig Catapult Warband doubles to the top of the hill in the right centre, and fires on the Mech Infantry Company placing a blast marker and getting ready to provide fire support  as the Squiggoths charge into combat.

The Guard vehicles that can do so unload their passengers, including two Ogryns, and the battle ensues...

It's a catastrophic loss for the Guard, with the remants falling back as I continue to advance. The Leman Russ company on the left flank obliterates a Junka Trukk formation.

The Ork Madboyz rush across open ground towards the centre Leman Russ Company...

Mike can't resist the target opportunity, takes the bait and opens fire killing 10 of the 12. The remaining two Madboyz being mad and  fearless continue the advance up the hill.

Here's the situation near the end of turn 2, with Orks advancing strongly in the centre and right.

View from behind the Ork lines.

And from behind the Guard Lines. The two Deathstrikes having shot their missiles now have only a heavy bolter each and advance in front of the Leman Russ tanks to shoot the Ork infantry, missing.

Turn 3

I win the strategy roll again, and one of the Orkeosauruses charges the Tank company on the hill, winning the combat and wrecking half of the tanks, along with a Hydra battery and the Deathstrike battery that had foolishly got involved. The Orkeosaurus is wounded and stampedes off squashing some more orks.

I then retain and assault with another Orkeosaurus against the other tank company, killing 4 of them and breaking them. My Orkeosaurus is wounded here too but stampedes away from the tanks avoiding stomping orks this time.

Mike's artillery fire continues to take a heavy toll, every battery that fires breaks an ork formation. There's more where they came from though and the orks continue sweeping into the Imperial left flank. The Boarboyz engage the Bombard battery here in a firefight and break them. 

Mike reinforces his centre with his other infantry company in an effort to defend his Blitz objective and centre artillery.

Turn 4

Some of my battered ork units have rallied, and rush to hold my own objectives. Here's the Madboyz grabbing my left flank objective. 

And the unfortunate Squig Catapult Warband also rally, rushing back to hold my own blitz objective. Some  demoralised Junka Trukks are hiding here too.

On my right, an Orkeosaurus moves back to hold my right side objective. The Steam Gargants have rallied but remain lurking  warily behind cover remembering the bad things that have just happened to them.

Mike manages to beat back the Ork attack in the centre, but has too few formations left to contest other objectives. I win 2-0 with Defend the Flag (hold my own three objectives), and Hold the Line (no enemy formations on my half of the table). 

Well there we go, after a demoralising start the orks managed to pull through. I'm still debating whether to have Orkeosauruses in pairs or singles. Singles gives more flexibility, but they are a bit weak when it comes time for actual combat.

In terms of what the Guard should have done differently, firstly I think Mike should have taken his Shadowswords as singles spread out more, or at least kept them more central. They wasted turns on the right flank doing nothing when they could have been punching holes in Orkeosauruses.  Also having his infantry debussed would have made all the difference in that first combat and he probably would have won it. And he should have ignored the Madboyz bait! Lastly learning to use a few scout sentinels, and avoiding so much intermingling of formations (getting formations within 5cm of another friendly formation), would have slowed the orks down, giving his tanks and artillery more time to pour fire into them.