I played a couple more epic games yesterday. This time with Glyn who's just arrived from Australia, where he's been living for the last couple of years after leaving the UK. Great to have another Epic player in town! Glyn has a truckload of lovely miniatures, though none with him that are painted up yet. Hence the temporarily assembled/based figures in the pictures.
It was also interesting to play someone from an Epic Group on the other side of the world, as you would invariably expect slight differences in rule interpretations and so on. It's a credit to the thoroughness of the Epic rules that we encountered no such issues over the course of two games though. Additionally it seems that both the Epic UK and our group here in New Zealand choose to use the "area terrain" rules convention. In other words, ruins, woods and so on are judged to block line of sight to the other side of the terrain feature, and you can see up 10cm into terrain features regardless of how they are modelled. This is an abstraction done for ease of play. In contrast Glyn noted that in Australia they tend to use "True Line of Sight", meaning models can see each other if they can see each other, also fine, just a bit more fiddly to work out at times.
To help out the international NetEA (Net Epic Armageddon) development process, Glyn was keen to test the Black Templar Space Marine list. For the same reason I wanted to try out the Tyranid list. For those unfamiliar with it, this talk of "list testing" means we are trying to get army lists to the stage that that they are well balanced lists that can be used in Tournaments. That meant we had to play these developmental lists against already approved Tournament lists. Therefore I used standard Orks against his Black Templars, before we switched and Glyn used a standard Marine list against my Tyranids. I'll cover that second game in my next post.
My Ork list for the first game was one I've used before reasonably successfully. It has four formations of Gunmobs which tend to be a bit under rated by many players I think. Sure they are slow and getting orks to shoot rather than rushing around can be challenging, but they are also pretty cheap and pack a wollop if they do hit!
Ork Army 2990 points
2 Nobz, 6 Boyz, 2 Grotz, Battlefortress, Warlord
WARBAND [315]
2 Nobz, 6 Boyz, 2 Grotz, Battlefortress
FIGHTA SQUADRON [250]
5 Fighta Bomba
FIGHTA SQUADRON [250]
5 Fighta Bomba
MEKBOY STOMPAMOB [560]
3 Stompa, Supa Stompa, Flakwagon, 2 Killa Kan
MEKBOY GUNMOB [175]
5 Big Gunz, Oddboy (Soopa)
MEKBOY GUNMOB [175]
5 Big Gunz, Oddboy (Soopa)
MEKBOY GUNMOB [175]
5 Big Gunz, Oddboy (Zzap)
MEKBOY GUNMOB [175]
5 Big Gunz, Oddboy (Zzap)
BLITZ BRIGADE [200]
4 Gunwagon, Oddboy (Zzap)
BLITZ BRIGADE (BIG) [250]
8 Deth Kopta
STORMBOYZ WARHORDE [150]
6 Commandos
I don't have Glyn's exact list on hand, but it was a Black Templar air assault style list that I believe was the following:
Black Templars 3000 points
- Landing craft
- 6 Tacticals, 2 Landraider Crusaders (in Landing Craft)
- 6 Tacticals, 2 Landraider Crusaders (in Landing Craft)
- Thunderhawk
- 6 Tacticals (in Thunderhawk)
- Thunderhawk
- 4 Close Assault Terminators (in Thunderhawk)
- 2 Thunderhawk Transporters
- 4 Predator Annihilators (in Thunderhawk Transporters)
- 2 Stormravens
- 5 Landspeeders
Turn 1
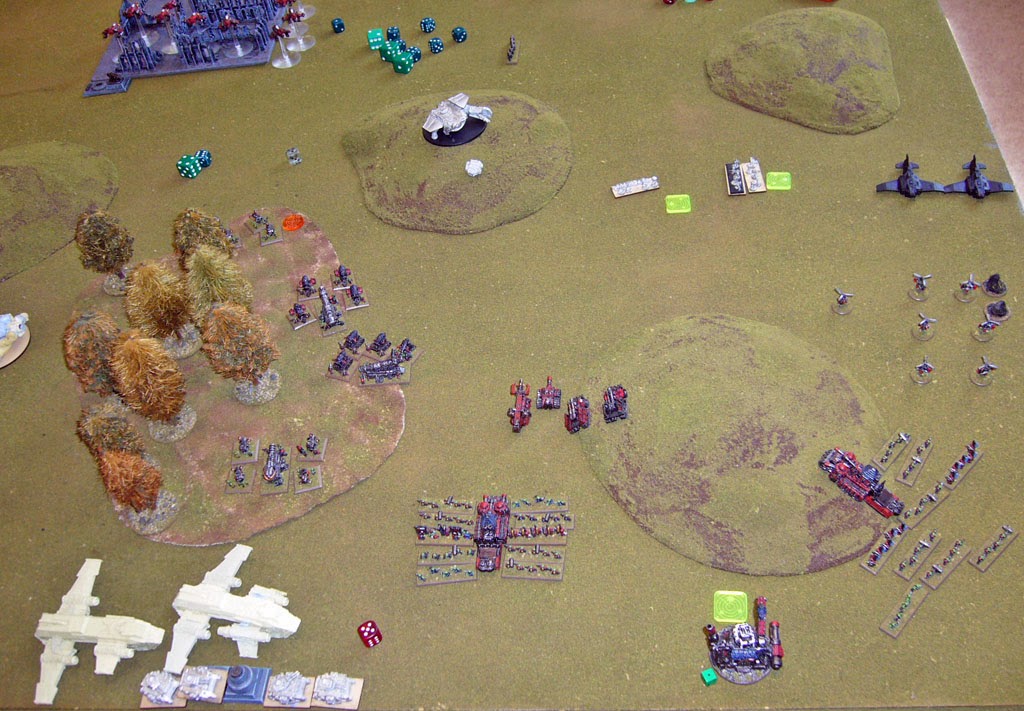
Here is the set up. Glyn selects corner deployment (deployment zones halfway up short and long sides) and places his Blitz objective in the far left top corner. Except for the Stormboyz spread out further up the table, my whole ork army is clumped together near the bottom right corner of the table. I placed the formations close enough to help each other out when all the Marine air assaults arrive, but not so close that they would be intermingled (i.e. not within 5cm of each other). My four Gunmobs are in the trees to my left, and the two with Zzap guns are on overwatch. All Glyn has on the table at the start are 5 Landspeeders garrisoned near the centre of the table!

Unexpectedly, I win the Strategy Roll. I have the choice of trying to order more Ork formations onto overwatch or my Fightabombas onto Combat Air Patrol - to try and shoot up the approaching Marine air assault. These are both good and sensible options, but instead I go for the easily available kill by activating all my aircraft and bombing the hell out of the Landspeeders! I kill three of them and the remaining two Landspeeders retreat broken. The rest of the Ork army is disappointed to see their air cover so distracted...

The Marines don't wait around, sending their Landing Craft full of Marines and Landraider Crusaders towards my Stompa Mob (which is my "Break their Spirit" objective). A single Ork Flakwagon fires pitifully but the shots patter harmlessly off the armoured Landing Craft. Rather stupidly I forget that I have a Gunmob with Zzap Gun on overwatch that could have zapped the Landing Craft immediately after it had landed and disembarked its troops.

The ensuing firefight turns into a disaster for the Marines despite my forgetfulness. Some of the Marines at the back are too far away to be in firefight range and the rest of the Marine fire bounces off the Stompa armour for the most part, or is absorbed by the Supa-Stompa shields. They kill only the Flakwagon and a Killa Kan. In exchange I kill a couple of marines and a Crusader and do a point of damage to the landing craft. Some of the nearby ork formations provide a few bursts of support fire, more as a sign of enthusiasm than anything usefully aimed though. Combat resolution sees the Marine formations retreating with heavy casualties.

Undaunted, the marines launch another air assault! This time I remember to fire the overwatching Zzap gun. It hits but only does a single point of damage to the Thunderhawk.

The Close Combat Terminators kill two Stompas and the other Killer Kan, but all but one of them is wiped out in return and I win the combat resolution by one point. The remaining Terminator stand retreats broken. The remains of the Stompa formation have had enough of being the focus of so much unwanted attention, and they too break and retreat, backing off their hill.

I open fire with a Gunmob Soopa-Gun, wiping out the remains of one of the previous Tactical formations. The Blitz Brigade advances firing their Zzap gun and destroying the Landing Craft (the Marine "Break their Spirit" victory condition). The Marine Stormravens fly in and kill a Deathcopter.

Yet another air assault. This time Tacticals in a Thunderhawk fly in and attack one of my Warband Mobs. This is the worst disaster yet for the Marines, as they only manage to kill a Gretchin stand and are then wiped out trying to retreat.

I double a Gunmob, firing a Soopa-Gun and wiping out the other Marine Tactical formation before the last Marine air assault arrives - Thunderhawk Transporters with Predators. They fire at my Stompa Mob, killing the last Stompa and doing a point of damage to the SupaStompa.
At this point we called the game over, as the Marines have all activated and also been almost wiped out already, and the Orks still have five formations left to activate! A series of disasters that the Inquisition will want to examine I think!
The purpose of this game was for Glyn to test out this air assault option. A combination of bad luck and some poor target choices didn't help the Marine cause I think. He acknowledged he needs to practice with it some more, and maybe get some more experience against Orks (or as I like to call them - "The One True Army" - yes Orks are my favourite). In hindsight, I think Glyn would have been better to pick a weaker first target than the Stompas (which had too much reinforced armour to kill reliably with firefight attacks). Alternatively or additionally, just landing a formation to provide suppression and support fire to subsequent assaults might have been more prudent. In any case, landing straight into combat in the centre of the Ork army without preparing the landing zone was a highly risky strategy that didn't pay off this time.
So we concluded our first game. For the second game Glyn used his regular Marine list and this proved to be a much tougher contest that went right down to the wire - I'll add that report soon! Thanks for reading!
Always pays to soften 'em up first before charging in. Balsy stuff though!
ReplyDeleteYep pretty heroic!
ReplyDelete